Webcam a.D.

test my webcam screenshot
A flash-based web-solution to test your webcam.

Mutter: “Was heißt A-Deeh?”
Sohn: “Adeeh (ade) is Schwääbisch und heischt Uff Wiederseen”
Vater & Sohn lachen.
Familie Heinz Becker

The Candidate

There are quite a few things I dislike about my laptop, but mainly financial reasons and the lack of a much better alternative (suggestions welcome!) make me being stuck with an HP Elitebook 6930p, a laptop that’s most often operated at home on a docking station because of a) a heavy power cord (the cord, not the transformer), b) a CCFL screen (instead of an LED option which would add another 1h of battery runtime), c) an internal 2G/3G/EV-DO modem that will only work in a MS-Windows environment and d) lousy battery runtime of about 2-3h on 4cell battery (I have another travel battery that extends it for a few hours, but also adds weight).

This computer…. I don’t know. Back in the days we used to say: HP = High Price, Huge Problems. The 6930p is quite durable and well built, but the CCFL screen is so 1990s. Brilliant colours vs. battery draining. Uargh…

The Webcam

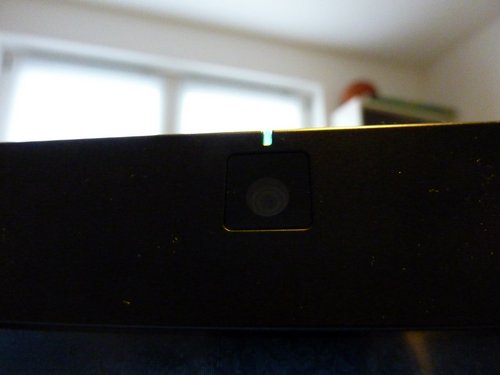
P1020864

The webcam on this said laptop has no cover – like many other modern laptops. If you feel being spied on via your webcam, mistrust the LED that’s supposed to show activity on the cam or never pay attention to it anyways, there are simple and professional ways to cover your webcam. I’ve used a piece of a note-it post in the past, others use their beloved duct tape or whatever is around. And then there’s the good solution that will cost you ~ US$ 12 or EUR 15 (even though it’s a German company!). Good but also expensive for a little piece of plastic. For half the price, ok. But 15 EUR is a bit too much.

https://www.youtube.com/watch?v=7W6tygVIzSM

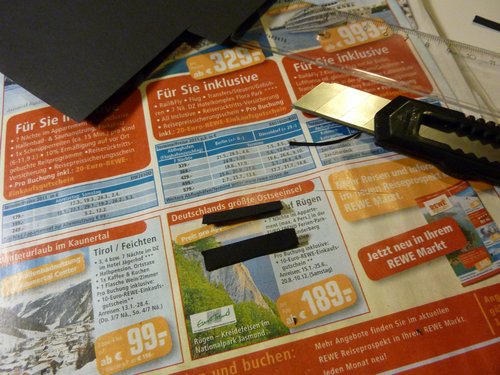
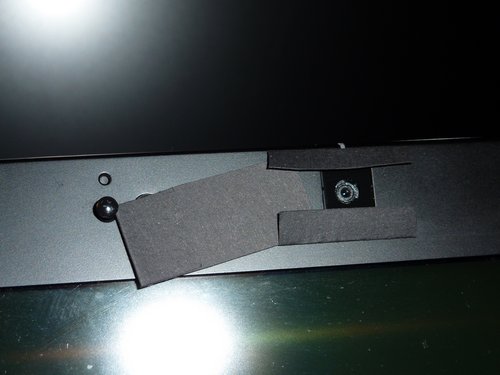
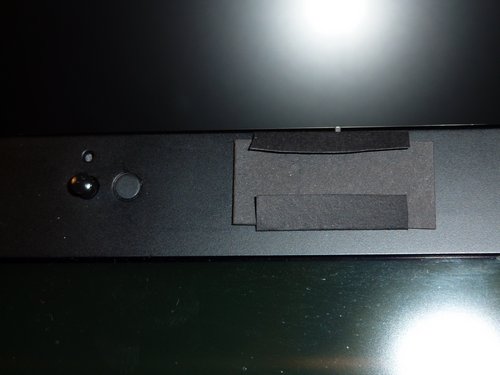
Time to build my own solution using black cardboad:

P1030318

P1030316

P1030326

P1030330

It’s cheap, it wins, it works!

P1030331

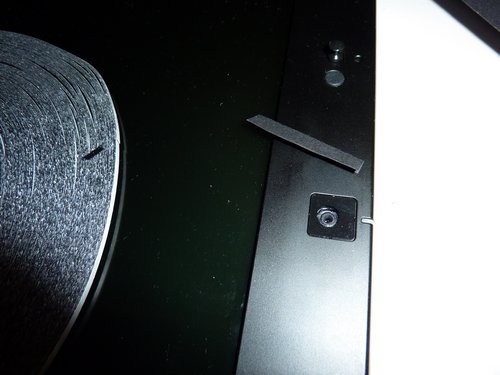
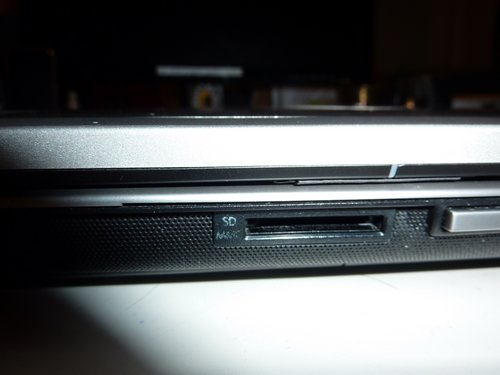
The laptop lid also closes without problems. Very nice!

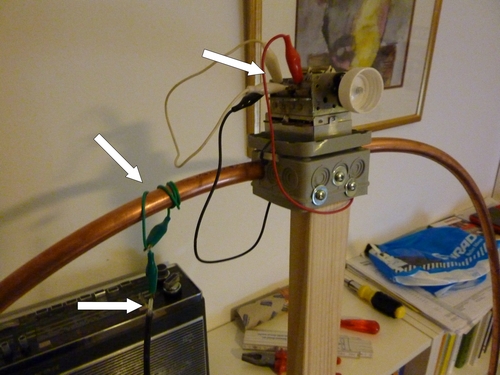
my first magnetic loop

Yay!

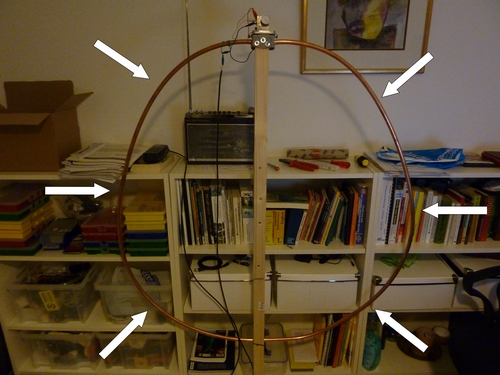
I’ve just completed building my first magnetic loop – a special antenna that’s supposed to catch some short wave signals in this LAN-infested electric smog environment. Popular with a lot of SWLs and radio hams since many many years, so with my powerline network plug and no space for a proper antenna on the roof, the magnetic loop is my only option.

loop1

The antenna is so jua kali, built from used parts – far away from an optimal setup, but I was longing for a quick win and an answer to the question if this is doable without much further ado.

It consists of a ~ 3,5m long copper pipe that’s supposed to be (bended) circular (= loop). I guess I’ll still need to optimise the shape fo this …. egg? :-)

loop2

The feed / cable to my receiver should actually be 1/5 of the diameter of the big loop and placed somewhere near the loop, but I ended up using these alligator clips which do the job for the moment. Obviously, lots of room for some improvements – starting by the shape of the loop. The alligator clips also helped in avoiding soldered cables which would probably attenuate the signal(s) even further. The knob I am using on the rotary capacitor is a bottle cap. It’s cheap, it works, it wins!

This setup is so primitive – but I am pleasantly surprised that it really works, hence the need to blog about it. Uhmm… building antennas is like a virus – once you’re infected, you won’t stop.

The Leatherman sheath mod, part 2

I didn’t know if I should blog the following – because stuff like this is usually shared on internet forums, but since I’d been writing about this before – and not only once – I thought about sharing it with you on my blog. Besides, I don’t do forums for various reasons.
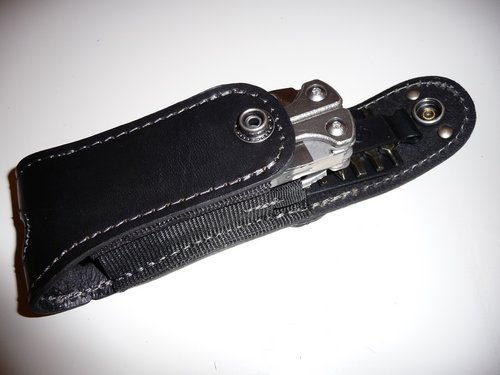
P1050711
the stupid Leatherman sheath

Some month ago, I bought a Leatherman Charge TTi multitool which came with a very bad leather sheath. The famous inventor of multitools once produced very fine leather sheaths, like the beautiful brown one that came with my first Leatherman Wave in 2003. But for some stupid and unknown (marketing?) reasons, their current sheaths (since 2004, actually) are either bulky, ugly or too stiff – and also do not really offer the space required for a Leatherman Charge TTi (or Wave 2004) and its bitholder. Everything fits inside but it takes a lot of force to pull the bitholder out. There’s a hole at the bottom of the sheath which is supposed to be good + so that you can rest the opened tool inside the sheath. I’ve never used this though, and also don’t like it that much.
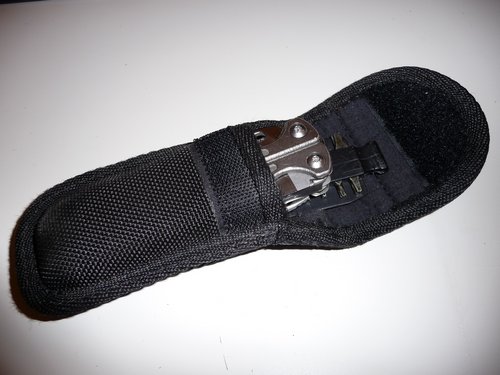
P1050710
SCHRADE TOOL, nylon alternative sheath (good, used this all the time)
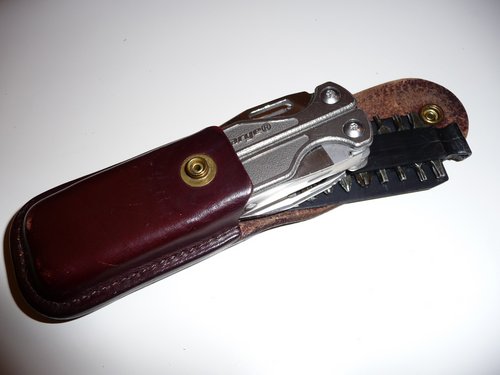
P1050708
Leatherman Charge TTI within the Leatherman Wave (I) sheath from 2003.
Tool fits, but + bitholder doesn’t :-(

I may not be the only one with this problem, and have in the past used a variety of other sheaths to tackle this problem (tool & bitholder in one place, see SCHRADE TOOL nylon sheath pictured above). There seems to be a market for customized solutions, and while I am sure I could easily get a modified sheath in the US or even Kenya, I just couldn’t find a good sheath in Germany (locally or imported), so I had to make my own. This time I wanted to make a sheath out of leather.
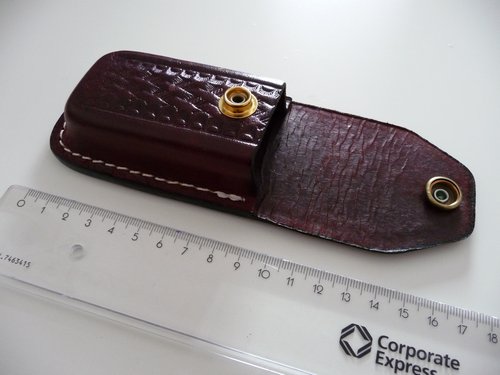
P1050558
Bought this one (Victorinox L sheath) from eBay which unfortunately is too short.

Now, I don’t know much about leather and do not even own many leather products. Shoes, belts and a pouch/sheath (made from artificial leather) that came shipped with my phone. But still, there’s some sort of magic to this material that will make you want to create something out of it. I was told that my great great great grandparents once owned a tannery, so maybe it’s somewhere in the genes. Sijui.

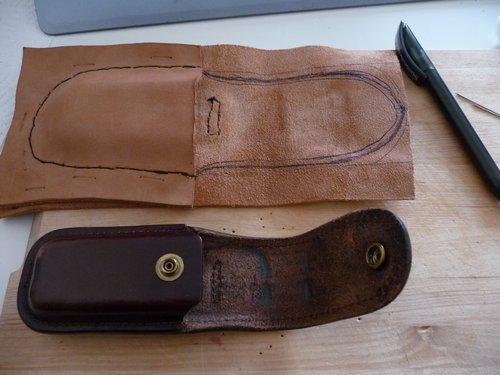
First step was to surf around and check various online resources for inspirations. I actually already knew what I wanted to build – my first Leatherman Wave sheath from 2003 had set the standard for me. I wanted something like this…. but only bigger.

Next step: leather. Found a very nice & cheap offer for leather stripes (2-3 mm thickness) on eBay, which was exactly what I was looking for.
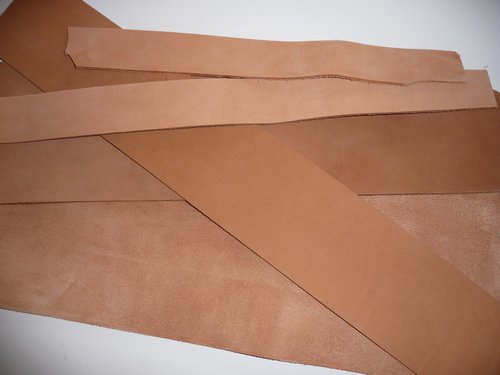
P1050569

Ok, now how do I get this material into shape? Does it really require to be formed into shape? And when does this need to be done? Prior to or after sewing the parts together?

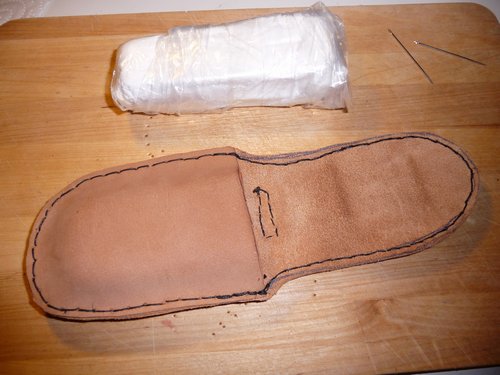
Sometimes you just have to do things your way. If it feels right, do it. So i dampened the leather, sealed the knife and bitholer in a plastic bag and placed it inside the leather which I then pressed into shape. Placed all of it on the heating in the bathroom and waited for it to dry up. Oh, and I used a stapler to hold it all together.
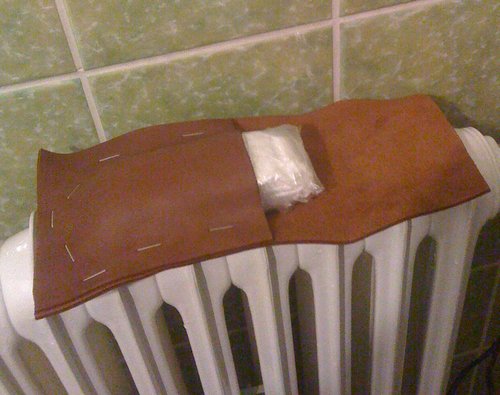
IMG 0249

Next morning: leather is dried up and in shape. Great!
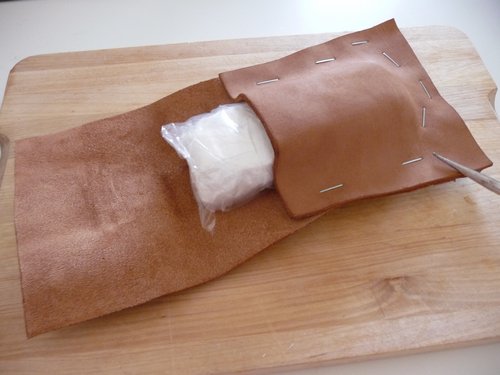
P1050654

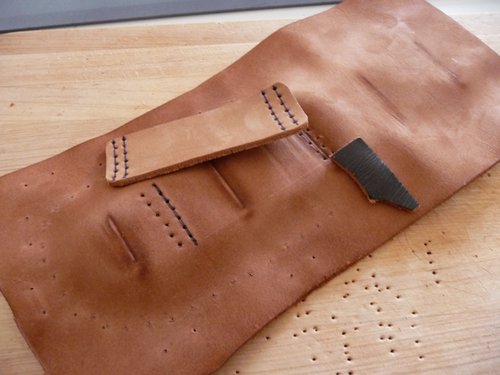
Next step: holes. Lots of them. I think there’s a wheel to mark the correct pitch between the holes, but since I do not own such an advanced tool, I just marked everything by rule of thumb and punched holes with an awl.
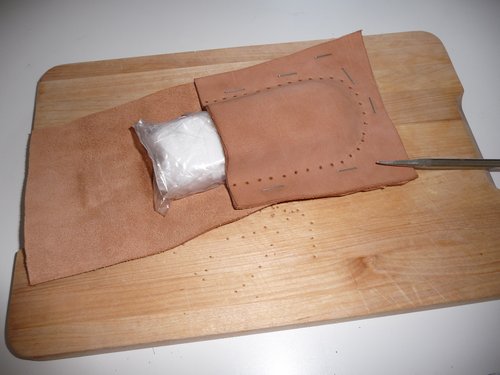
P1050657
front

P1050663
back

After the first stitches with special leather yarn, I realized that the one I used is too thin (2x, left), so I went for the only thicker one I had (3x, right).
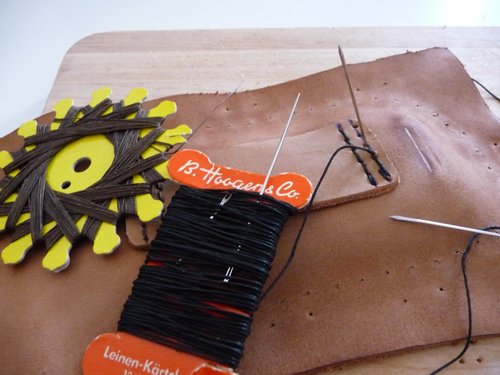
P1050666

I may not be a professional and my seams may show that I am a bloody beginner, but at least I am using two needles.
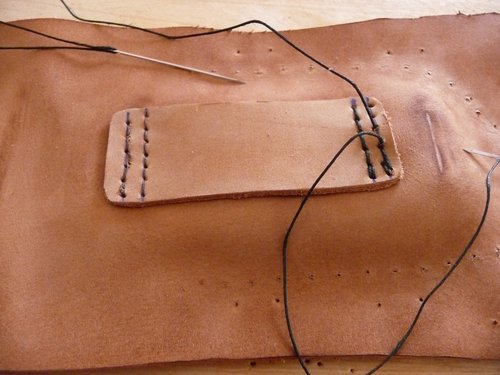
P1050667
stitching on the left: too thin

P1050673
both sides

P1050675
next up: the main seam

P1050677
big & small, wondering about the design
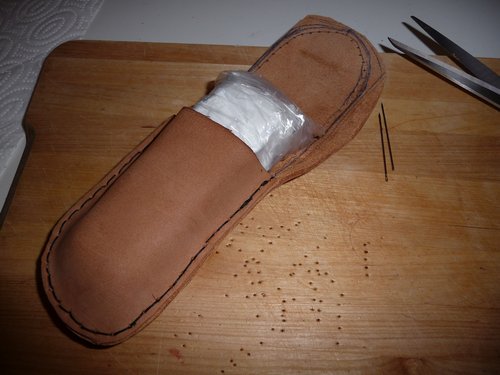
P1050685
slowly getting there

P1050689
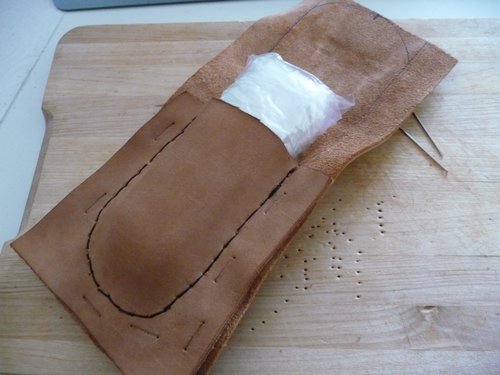
Almost done. The white package contains the Leatherman Charge TTi + the bitholder.
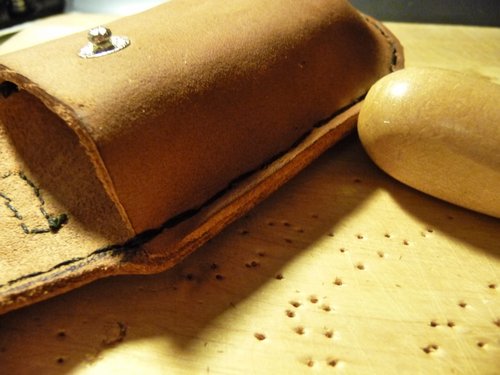
P1050694

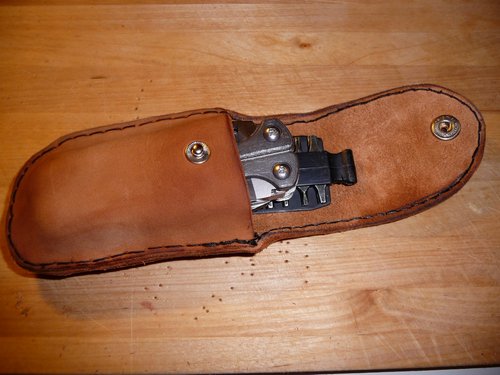
I then dampened the leather again and used the wodden knob to flatten the edges of the leather. Again, I am no expert and maybe there’s a proper way for doing this, but I just looked at the old sheath and realized it had to work out somehow. Well, it did. Edges are smoothened now and quite shiny. Nice!
P1050701
new sheath

P1050703
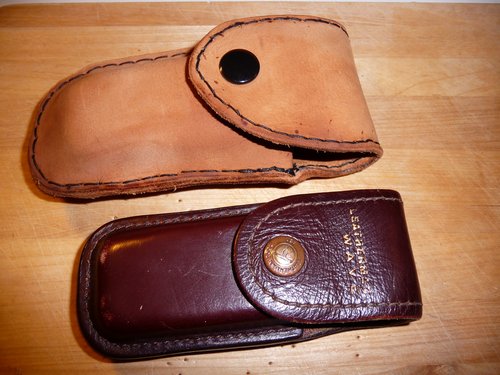
new and old sheath

P1050705
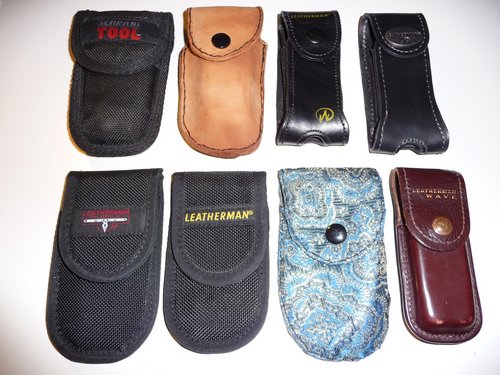
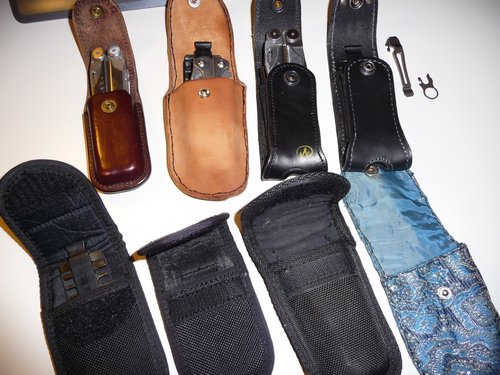
The complete collection: opened and closed.
P1050706

You may note the nylon sheaths. These are also fine but (except for the SCHRADE TOOL sheath) only accommodate the tool itself, not the bitholder. Again, I don’t know why Leatherman does not produce proper sheaths. Something like the dark brown sheath (which imo is the best) from 2003, but bigger. You will also notice my beginner’s style and how dumb my own sheaths (noticed the blue one? :-) actually look when compared to the professional solutions.

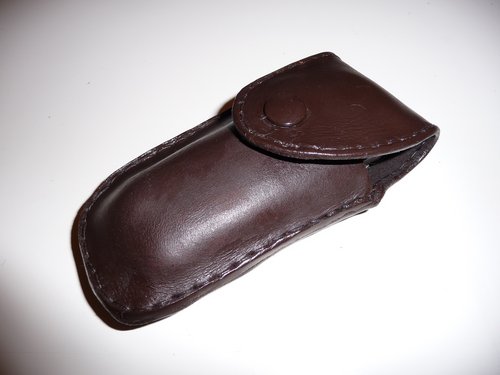
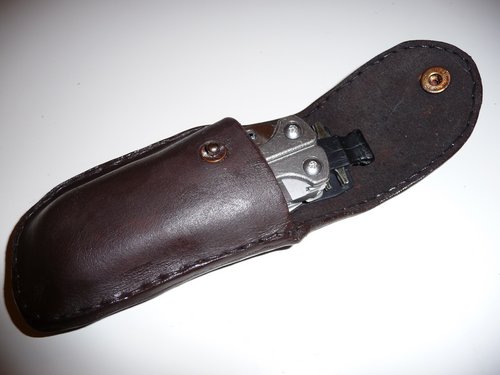
One possible solution would probably have been to further apply some wax on the new sheath and darken it. Well, I polished it with some special leather wax, but also applied this dark brown (imo a bit too dark, damn..) leather colour onto it. Looks ok, but I also know what to improve on next time. Ah well… as long as it works it is ok. I really wish someone would seriously teach me a few tricks though, like how to get straight seams. For this, however, I would probably also require a table for my tools and a bench vice.
P1050712

P1050713

Working with leather is a fascinating experience!

(Wenn ich nochmal 20 wäre, würde ich mich nach einer Lehre als Sattler/Feintäschner/etc. umschauen. Bin ich aber nicht mehr und habe auch schon eine Lehre hinter mir, das reicht. Als Abendkurs in der VHS wäre eine Fortbildung in Lederarbeiten aber sehr interessant – auch wenn ich im Moment keinen weiteren Einsatzzweck für Lederprodukte habe. Nach dieser Arbeit kann ich aber sehr gut verstehen, wieso es anscheinend ziemlich viele Leute da draußen gibt, die in ihrer Freizeit Leder punzieren (= mitm Hammer Muster ins Leder treiben) und/oder ihren Indianer/Rocker/SM/whatever-Trieb damit ausleben. Is aber alles nich so mein Ding, will ja nur ein passendes Lederetui für meinen Leatherman haben. Ich vermute übrigens, dass man durch versenkte Nähte (Rille ins Leder treiben) und den Einsatz von Stecheisen schon geradere Nähte hinbekommen würde, aber das hebe ich mir fürs nächste Mal auf. Das nächste Produkt aus den verbliebenen Lederresten werde ich aber nicht mehr anmalen, oder zumindest nicht mit so einer dunklen Farbe, auch wenn das jetzt nur auf den Bildern im Blitzlicht so schlimm ausschaut..).

Creakia E72

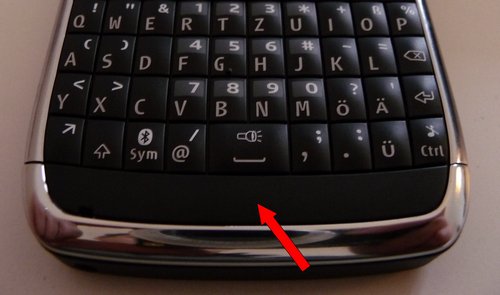
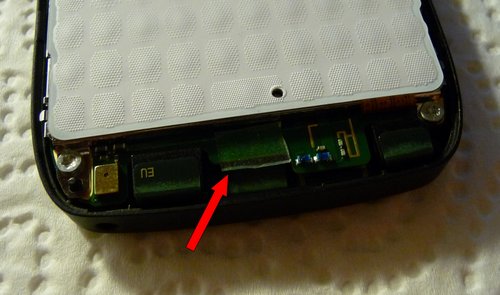
A comment on CJs latest review of the Nokia E72 reminded me of something I had also observed on my phone: “a tiny creak in the lower bar below the spacebar”. A noise that irritates the user and shouldn’t be on a brand new phone.

fix0

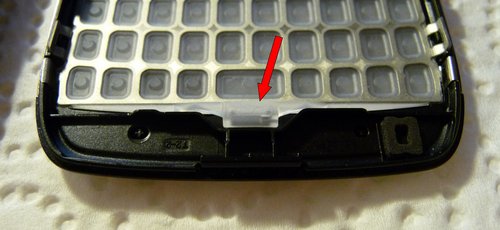
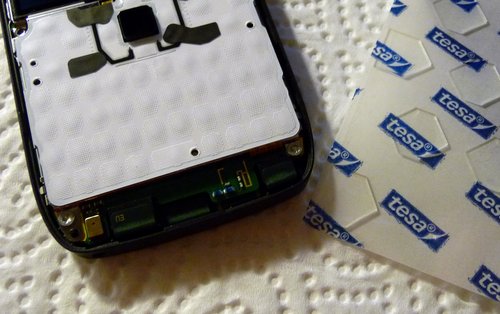
Since I had already opened it up the other day, I knew where the noise came from and consequently fixed it by adding a piece cut from double-sided adhesive pads as seen in the following pictures.

fix2
(behind the keypad – too much play even though there’s a silicone gasket already in place…)

fix4

fix3

It’s simple, it’s cheap, it wins!

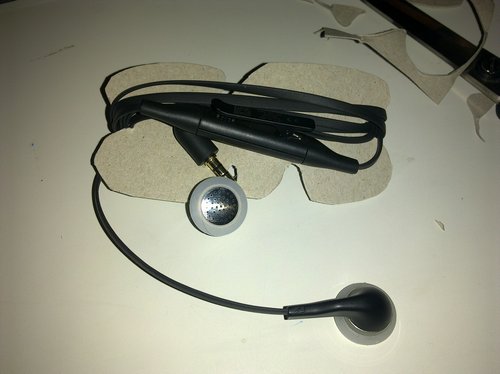
the cable thingy for Nokia’s (E72) WH-601 headset

While searching for a little present for her, I came across this simple cable retractor – which inspired me to build my own.

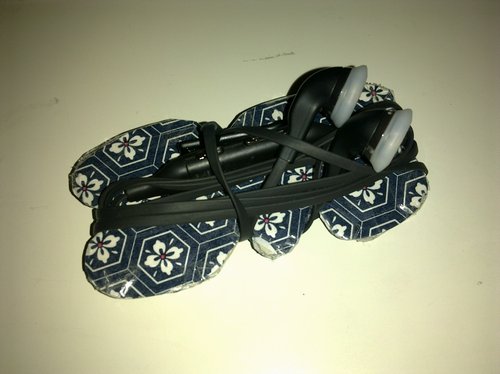
As with most other headsets by Nokia, the WH-601 that came shipped with my E72 is a little bit stubborn as the cables seem to contain too much rubber. And while this may as well be intended by Nokia’s engineers (or because no one at their Chinese factories maybe never really thought about this), storing the headset in your pocket will ultimately frustrate you sooner or later. It unfolds inside the pocket – and this peculiar behaviour will not change over time with more frequent use. It’s a design fault, in my opinion.

06012010142

One possible solution is such a cable thingy which can be bought in different shapes (there are even some with magnetic clips) or built on your own (hint hint, dear Kenyan jua kali workers: how about a version cut from car tires or flip flop sandals?). It just consists of some glued cardboard, wrapped in paper. It’s my first prototype and I may come up with a better solution – but for the moment, this will do:
06012010143

Nokia headsets have always been an issue on my blog. This one comes with a nice (much better) remote control (than the one on my N95). However, the headphones suck so much because of their shape (which can be adjusted using silicone caps, at least) and because of the sound they deliver.

I made this JKE-version of a headset in September 2008 which still works and delivers beautiful sound using Sony headphones. The cables are a bit too short on this mod though, and the remote control on the WH-601 is nice, slimmer and thus more attractive. I will probably hack this new headset soon and solder my favourite Sony headphones to the pcb inside the remote control.

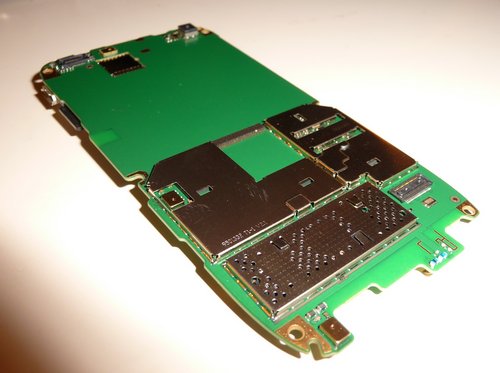
And for those of you who came here looking for geek pr0n, here’s a recent pic of my opened Nokia E72 – enjoy :-)

P1050048

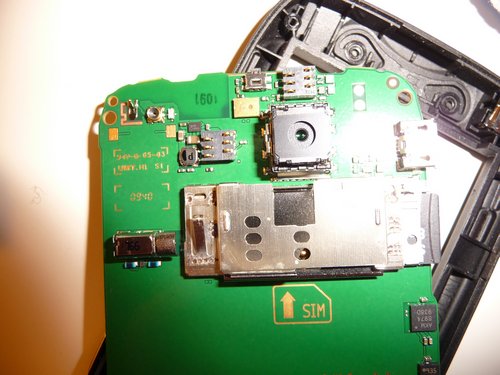
One may assume that the active parts (besides of the keypad, display, antenna, charger port, etc.) are all hidden underneath these metal cases only. Well…they are, and if you’ve ever opened a mobile phone yourself, you will know what they usually look like. So this is some fine piece of hardware engineering, I’d say. It’s ALL under these few covers. Also, the (multi-layered?!) pcb is of good quality. The only thing I don’t like from this first visual inspection (I had to open it because of dust under the display – yes, on a 4 weeks old phone. Nokia…) is that both microphones are directly soldered onto the pcb. The one above (visible on this pic within the gap on the left side next to the metal shields) is part of the noise reduction circuit. It’s also where most current E72 owners are crying out loud because it results in a noticeable light leakage on the keyboard. But uhm, well…. that’s the difference between a phone with many buttons (= QWERTY keyboard) and a touchscreen phone, I’d say. You can’t have it all.

P1050031

Anyways, I am happily surprised by the built quality I’ve found on the E72 and how (previously) fragile parts seem to be well engineered this time. I know the E71 has a better back cover and (metal) middle frame, but it still is a lot of high-tech they’ve hidden underneath these few metal shields. If it wasn’t for the display, the keyboard and the battery, the E72 could just as well fit into a matchbox. Seriously. Great hardware.

P1050032

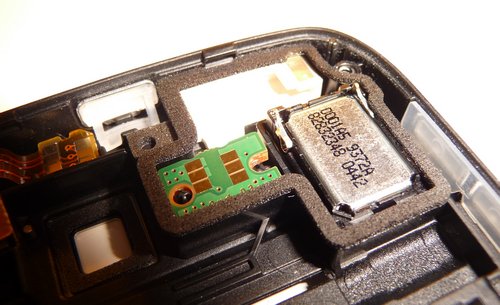
Oh, and check out this massive pcb (the green part) that powers the camera flash and flashlight! Has about 1-2mm thickness.

It’s just great pleasure to see how things are engineered and that someone really thought about such design details and how they could reduce costs, materials and improve accessibility. Two screws and you can already remove the display, 4 more screws and it’s dissassembled.

Now I wish that someone at Nokia is smart enough to reconsider the materials used on their (cheaper) headsets, and that they really improve their OVI store + fill it up with Gravity-styled apps.

P.S.: Happy 2010 to all of you!

my take on AfricaGathering in London

I’ve just returned home from London where I’d been attending AfricaGathering on Saturday 25 April 2009 which was held at Birkbeck College, University of London. A perfectly organised event (by Ed Scotcher & many helpful volunteers – thx!), the Gathering turned out to be quite a success, especially as it eventually provided me with the opportunity to meet some of my AfriMates in real life.

P1010882

Kudos also go out to Karola Riegler who took lots of photos throughout the day and to @RedZola & @MatthewNcube who both helped me trying to get online as the University’s WiFi didn’t work out for me.

So instead of providing you with a summary of all talks (I also presented some slides on AfriGadget and couldn’t do any liveblogging), let me just forward you to the following blogs that already did an excellent job of blogging on the event:

There may be even more interesting posts on AfricaGathering. It also helps to do a Twitter and/or Flickr search on #africagathering to catch some additional links (Twitter Search is a gold mine for anyone interested in ppl and their opinions).

Ed also filmed the event and promised to upload some talks to Vimeo this coming week – so let’s stay tuned for an update. Filming such an event is really sustainable and helps those who couldn’t make it to London in time. Teddy of ProjectDiaspora.org was also supposed to attend the panel discussion, but stupid visa regulations killed this endeavour.

P1010879

Some attendees already met on Friday evening for great Ethiopian food at Lalibela Ethiopian Restaurant – including David McQueen and Sokari Ekine. It was very nice to eventually say hello to Sokari, who I’d been spamming with links via delicious.com for the past few months. Eh, Sokari – we will be back to London in June!

There have been so many inspiring conversations and shared ideas during this AfricaGathering that it would seem to be unfair to pick out a few selected ones -so I will only add a few words to my own presentation. I also need to work on my presentation style as I am bit too nervous on stage, often speaking too fast or having too many details on my mind that I want to include and then miss out. It was a great opportunity though to present our work and I am also quite passionate about it. Oh, and pls ignore that extra slide on a Liverpool flag as seen in a pub in Garissa the other day – unless of course you are like Ken of Kiwanja.net, whose pic on mobile pay phones we’ve used on one of the slides. :-)

My presentation on AfriGadget on behalf of the whole AfriGadget team (remember, it’s a group blog and everyone is invited to contribute and share interesting AfriGadgets – even you!) wasn’t primarily focused at displaying interesting or funny AfriGadgets even though I introduced it by saying that “we are not here to help anyone, we only do this for fun”.

My message between the lines rather was that there’s still so much undiscovered potential on the continent that needs to be commercialised (I hope I got this message across?). AfriGadget is just the vehicle to showcase that there are innovative solutions that work on a local level.

There’s a new generation of young & skilled workers who grew up with mobile phones & an understanding of how technology works. Skilled IT workers who can already take over programming jobs and develope their own tools.

Of course, IT isn’t the only sector and there are other sectors that will benefit from a new perspective on development in Africa. I, for one, believe that the upcoming sea cable(s) – which will help providing better broadband internet access to many African countries – will also help in providing some incentives for the younger generation to stay in rural areas. The internet has changed the way we live and work – I am also working as a consultant from my home office. Consequently, this progress in the IT sector could hopefully also influence other sectors.

Ecological sanitation concepts, for example, currently work best in rural areas. And with an increasing urbanisation, things are only getting worse. As long as we (humans) do not come up with sustainable cities and (much) more urban agriculture (as a way to provide real livelihood for everyone), there will be a need to “upgrade” rural areas and create markets in such areas. Better internet connectivity and the provision of sustainable power supplies is a way forward as it helps ppl to go about their business.

Business, or the consumer orientation, is my 2nd point on the AG presentation. I think that commercialism has for a long time been undererstimated in the African context. We need to return to free markets and an understanding that people knew how to trade goods (and make a living out of it!) a long time before outsiders occupied SubSaharan Africa and introduced new cultural values.

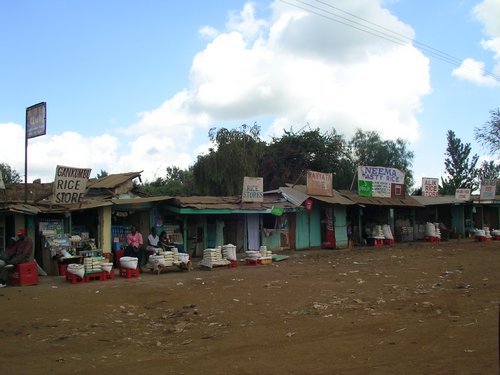
SANY7326

And by mentioning commerce, I am not talking about dealers in a small village who are ALL selling the same product (like the one pictured above where everyone sells rice), but instead a healthy trade of locally produced goods and services and much more diversity.

Someone from the audience asked if ppl would also be this inventive if they weren’t that poor and could afford to buy “better” products. It’s a tricky question because in reality it’s often not a question of being rich or poor, but rather the availability of affordable solutions. If you just can not buy enough welding machines that are required in the metal business and also won’t get a credit because you are not credit-worthy or because there’s no serious bank around, then you have to look for alternative solutions and make do with what is available. If the problem could be solved by being rich and just importing a welding machine from let’s say a Chinese manufacturer, the African economy wouldn’t benefit as much as when these machines are produced locally. As a consequence of that, ppl are instinctively doing the right thing by developing their own solutions and providing business opportunities for a local market. It’s a natural process that may not be that visible, or maybe even condemned by those who still believe that superior products have to come from the outside.

This btw also happened in Zimbabwe some time ago when local supply of sanitary towels was limited and women (not men) had to come up with their own solutions, e.g. using natural materials. Now, from a technical (process engineering) point of view, it’s much easier to treat natural (biodegradable) products than plastics – at least when it comes to the stuff ppl are flushing down their toilets. So these alternative sanitary towels may not be as convenient as those from the supermarket, but they are available and affordable. By the end of the day, products that work for customers will prevail. Everything else is just luxury and filed under “nice-to-have”.

Alasdair Munn also put it nicely on his blog:

“Technology solutions coming out of Africa are built with purpose, against objectives and within the boundaries of their resources. It is a solutions based approach. It is also a stripped down approach where only the relevant resources and tools are used. Simple works because less can go wrong and if it does go wrong, simple is easier to fix. There is a shift in the way tools and technologies are looked at.”

I believe that there’s no master plan for development in Africa, and even less a need for a well-meant guideline from the outside. There’s no one-way solution and this AfricaGathering certainly wasn’t meant to look for solutions “on how to help” etc. etc.. People in need know how to help themselves as most governments on this planet only exist to set a legal framework. We, the people, have to bring the change we want and so it was a valuable opportunity to team up with other like-minded folks during AfricaGathering who have understood that less help and more business may be an interesting alternative for a better way forward.

AOB: I spent less than 48h in London and met enough people to whom I was introduced as “Kikuyumoja”. It still amazes me that ppl know about this blog.

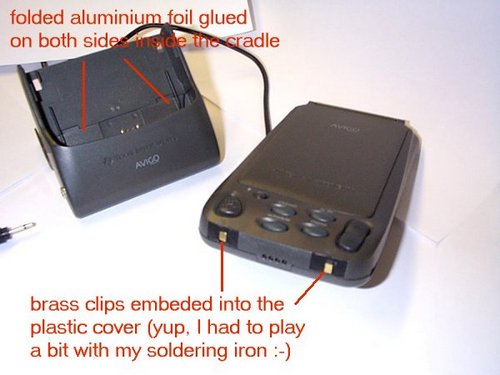
Avigo10

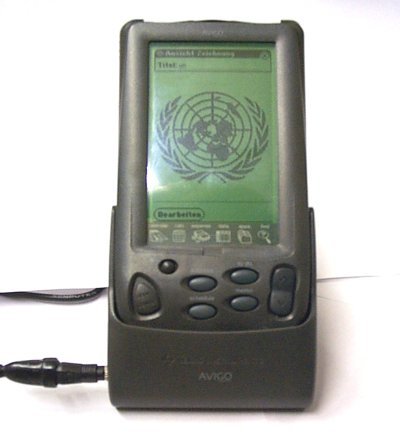
IF you knew what most digital cameras back in 1999 looked like – and how much they would cost back then – you’ll quickly understand that it’s rather astonishing to have these digital images from my beloved TexasInstruments AVIGO10 PDA I’ve just unearthed from a sub-sub-sub-directory on my harddisk.

Avigo02

It’s a rather childish mod/hack that I had done on this outdated PDA way back in 1999 and of which I was reminded just a few minutes ago while googling for a link to this weekend’s AfrikaCamp in Vienna.

Mzeecedric of m.zung.us and I will attend this event and I’ll also try to cover it on my blog if everything works out as planned. I am not expecting too much though, just an open meeting and exchange with interested and active folks in Europe (or let’s say Austria and Germany) who also have some sort of Mal d’Afrique on their agenda or anything else related to this matter.

Coming back to the mod: while googling for the link, I stumbled upon Robert Lender’s website – a fellow blogger who had contacted me way back in 1999 on this hack and had integrated it on his page dedicated to this PDA. I guess I may even have his e-mail somewhere. Ok, now that’s 10 years ago, and if you ask yourself what you did in 1999, you’ll probably say that you’d been online via CompuServe or AOL and probably also hosted your site on Ethan Zuckerman’s Tripod site. Yup. 1999. Long time ago.

This post is dedicated to Robert and it will be especially interesting to see a face behind this contact whose name has been around for such a long time.

The original page on http://kikuyumoja.de/avigo has been offline for quite some time now, but I just copied everything into a PDF.

Avigo01

I btw still have this PDA at home. Compared to my friends who owned stupid Palm PDAs, the Avigo10 was a bit cheaper and not as popular as a Palm Pilot PDA, hence less software being available for this product. It also lacked the marketing backup from TI who quickly dropped this product from their product line for unknown reasons. Kinda sad, especially since this PDA came with a serial connector and could be hooked up to a modem which turned it into a great telnet device among other cool hacks.

Actually, it’s kinda worrying to see that even now in 2009, most mobile devices still lack such basic services (telnet, ssh, etc.) and charge you extra for a comfort we already had in 1999. As for the issue of power consumption, I think that we’ll also need to have a revolution on the energy side: something where we will not only see more efficient and energy-saving devices with smaller CPUs, but instead also devices that generate the energy the moment you need it and thus reduce our needs for stronger batteries.

@T.H.User: FFM, 1999, Nordi, MediaMarkt! Erinnerst Du Dich noch? Das Gerät hatten wir damals zusammen gekauft! :-)

the LED phone hack

The following post is dedicated to Samuel & Juliana – both connoisseurs of mobile phones that come with an integrated flashlight (such as the Nokia 1208).

An integrated LED flashlight? What’s the big deal?

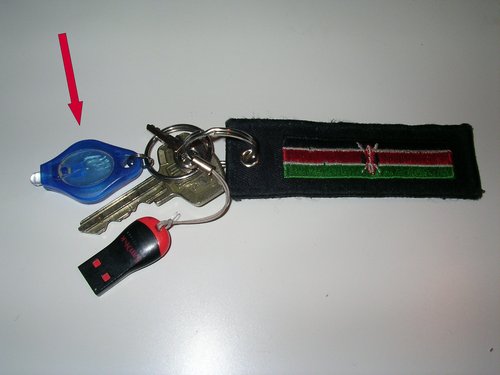
Well, if you happen to live in a country with frequent power failures and favour all-in-one devices, an integrated flashlight comes in handy for those moments when it’s too windy or otherwise inappropriate to use a lighter as a source of light. Dedicated LED-based flashlights are nice and proven – I have mine on the keychain – got it free from Globetrotter.de some years ago.

SANY1846

Sure, you could even use the brigtly illuminated screen on your phone to satisfy any quick needs for a source of light, but it just isn’t the same comfort and also isn’t right on one single spot. There btw is a fancy app for the iPhone which provides a blank white screen to substitute a flash (says @mzeecedric). Quite a ROFL-factor but more like a gimmick. Other recent Nokias with S60 and LED-flash for photography can be modified on the hardware side, e.g. cutting a wire on the printed circuit flex cable. Those “flash lights” weren’t made for constant illumination needs, hence it’s highly recommended not to do that.

I’d been thinking about a DIY alternative for a phone that could be realized by any average phone fundi out there and consequently didn’t want to come up with any SMD-type solution that would probably do a much better job, but instead come up with a simple hack that – most importantly – may be reversed to preserve any warranty on the phone.

The actual need for this project arose late last night after Samuel’s tweet on how he misses the flashlight. Besides, I had urgent work to finish so I needed an external incentive to push me through the evening until I could eventually put my hands on this “hack”.

The players:

SANY1852

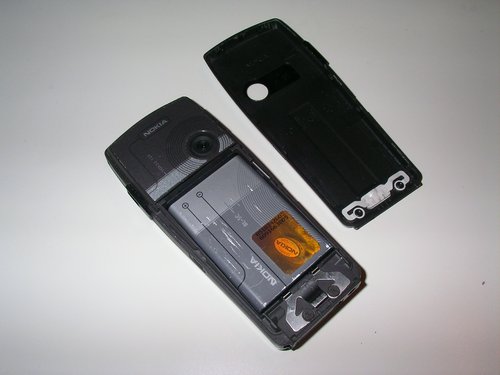
an older Nokia 6230 I rescued from eBay some time ago (my 6230i walked away in a Were-sense…). Here you can already see the thin back cover which can be replaced anytime and is thus perfectly made for hacks.

14052008203

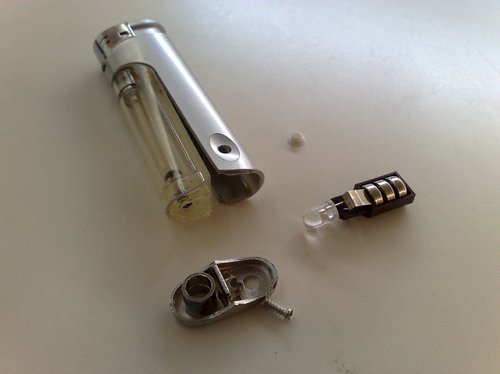
an old LED with batteries from a dead lighter

So let’s start with….

1. the cheap solution :-)

phonemod1

A quick ‘n’ dirty solution that will just do the job.

Not very sustainable though. Which gets us to…

2. the slightly better option

Many Nokia phones come with an exchangable cover, so it’s obvious to make use of the plastic cover which can be exchanged any time. And since there isn’t much space for a bigger battery, we’ll also use the phone’s own battery. After all, it’s based on LithiumIon technology which means relatively high energy density.

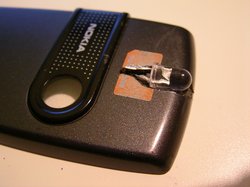
The LED is in blue colour, but basically any stronger LED will do the job. Your fundi may be able to resuce one from the usual e-waste found in popular places. I am also not using any resistor or any other passive & active parts to keep it really simple. All we need to do is to sacrifice the back cover for this hack (coz the LED has to go somewhere) and get a direct connection to the battery.

So I’d asked myself:

  1. Where do I put the LED?
  2. Will I need a switch to activate it?
  3. How will I manage to connect it to the battery, given the narrow space in between the cover and the battery?

To worsen the situation even more, I currently do not have access to my usual tools, but then again, that’s the challenge after all – trying to find a decent solution under limited conditions. All I currently have are scissors, my Leatherman Wave, a (really!) cheap voltmeter and a monsterous 30W soldering iron. My Gadgetimoja-toolbox is somewhere else on this planet…

Trying to find a short piece of relatively thin wire turned out to be the hardest part – I have lots of that stuff at home – but where is it when you need it??

So I did what everyone does in such situations: improvise – and take it from somewhere else. In other words: look for another electronical device and see if you can “borrow” some 10cm of wire from that.

SANY1860

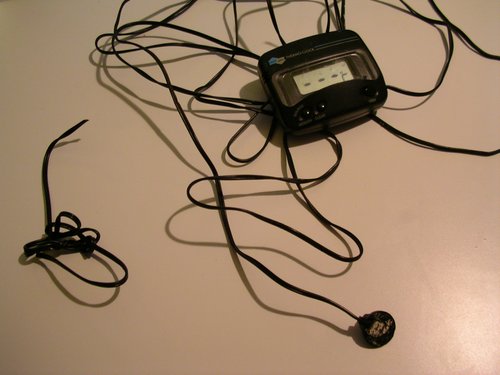
Pole sana, dear electrical thermometer. It’s friggin cold outside anyways so at least I’ve provided you with a few indoor minutes. And thx for the cable!

Improvising also means that you do things by trial & error and try to avoid any hardware modifications by simulating the scenario in your head. Will this work? Where will I put the LED? Can it still fit? And what about that damn switch??

SANY1862

It works!

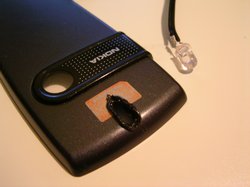
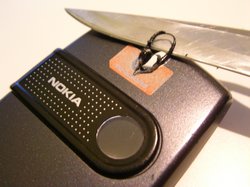
I’d made good experience with “drilling” decent holes into plastic (mis)using a cheap soldering iron in the past, so I just continued “drilling” a hole (don’t try this at home, kids) using this method. Just make sure you actually clean the iron afterwards and while it’s still hot.

SANY1865SANY1867

SANY1868 SANY1871

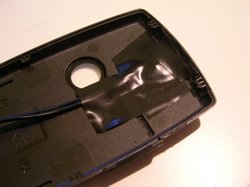
SANY1872SANY1875

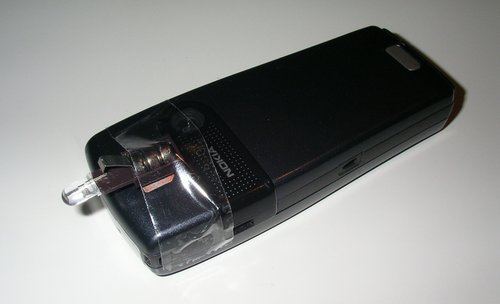
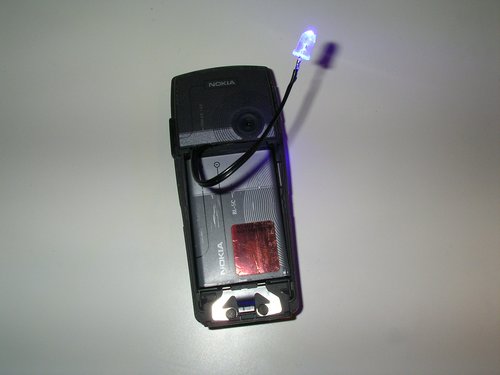
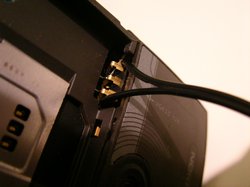
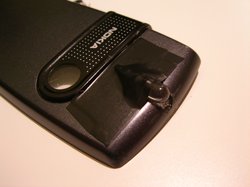
As you can see from the pictures above, the cables are just loosely joined with the wonderful battery dock on the phone so that you can remove them any time. The LED is rather big but “somehow” fits onto the edge of the back cover. Also, the cable is still too thick and the back cover will not close the way it is supposed to (also because my phone….ahem…let’s say: had already survived a few other “operations” in the past + remember I’d previously aquired it in an awful condition from eBay).

A “switch” is also missing but this was just version 0.1 to show it’s doable to pimp an ordinary phone into a flashlight phone. It’s a jua kali hack for prototyping, I’d say.

Do you have any ideas for a switch? How would you design it? Maybe integrate it on the side? And is it locally available (= keep it cheap and simple)?

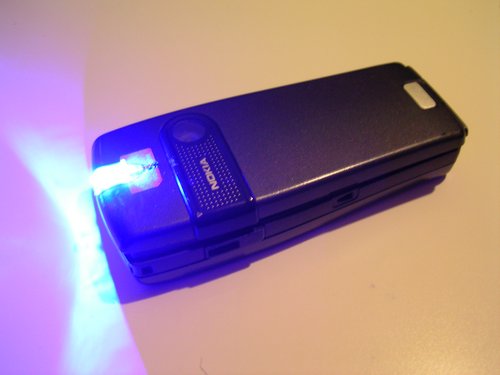
SANY1873

The activated LED with the back cover just put on top.

I will try to organise two more back covers so that I can play around and see what else is possible. Ideally, I’d like to see someone else from Nairobi pick this up (if not already done – sijui if this already exists in Nbo these days?) and modify it into a commercial add-on for wanainchii. After all, phones with flashlights just rock and should imho be on any phone out there. This solution here won’t jeopardize the gadget itself – and such a plastic back cover is cheap, especially this one (with a Vodafone branding, yuck!).