


Everyone – please have a Happy New Year!

Everyone – please have a Happy New Year!
Yay!
I’ve just completed building my first magnetic loop – a special antenna that’s supposed to catch some short wave signals in this LAN-infested electric smog environment. Popular with a lot of SWLs and radio hams since many many years, so with my powerline network plug and no space for a proper antenna on the roof, the magnetic loop is my only option.
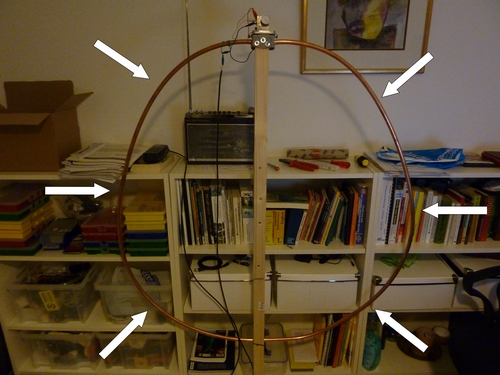
The antenna is so jua kali, built from used parts – far away from an optimal setup, but I was longing for a quick win and an answer to the question if this is doable without much further ado.
It consists of a ~ 3,5m long copper pipe that’s supposed to be (bended) circular (= loop). I guess I’ll still need to optimise the shape fo this …. egg? :-)
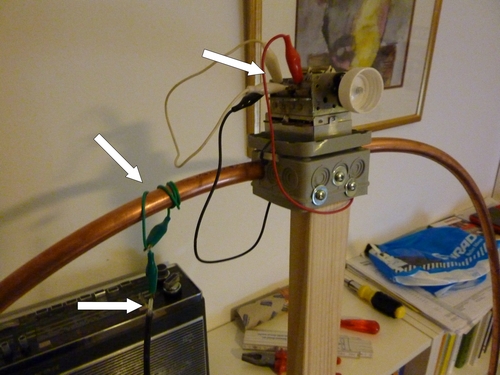
The feed / cable to my receiver should actually be 1/5 of the diameter of the big loop and placed somewhere near the loop, but I ended up using these alligator clips which do the job for the moment. Obviously, lots of room for some improvements – starting by the shape of the loop. The alligator clips also helped in avoiding soldered cables which would probably attenuate the signal(s) even further. The knob I am using on the rotary capacitor is a bottle cap. It’s cheap, it works, it wins!
This setup is so primitive – but I am pleasantly surprised that it really works, hence the need to blog about it. Uhmm… building antennas is like a virus – once you’re infected, you won’t stop.
I didn’t know if I should blog the following – because stuff like this is usually shared on internet forums, but since I’d been writing about this before – and not only once – I thought about sharing it with you on my blog. Besides, I don’t do forums for various reasons.
the stupid Leatherman sheath
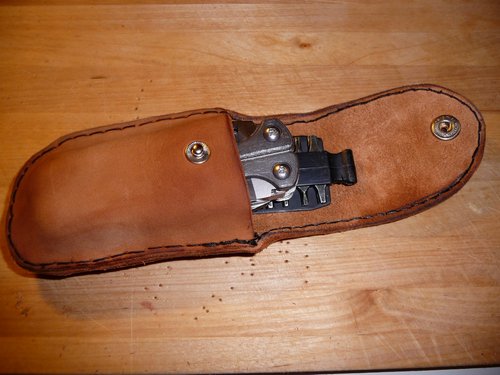
Some month ago, I bought a Leatherman Charge TTi multitool which came with a very bad leather sheath. The famous inventor of multitools once produced very fine leather sheaths, like the beautiful brown one that came with my first Leatherman Wave in 2003. But for some stupid and unknown (marketing?) reasons, their current sheaths (since 2004, actually) are either bulky, ugly or too stiff – and also do not really offer the space required for a Leatherman Charge TTi (or Wave 2004) and its bitholder. Everything fits inside but it takes a lot of force to pull the bitholder out. There’s a hole at the bottom of the sheath which is supposed to be good + so that you can rest the opened tool inside the sheath. I’ve never used this though, and also don’t like it that much.
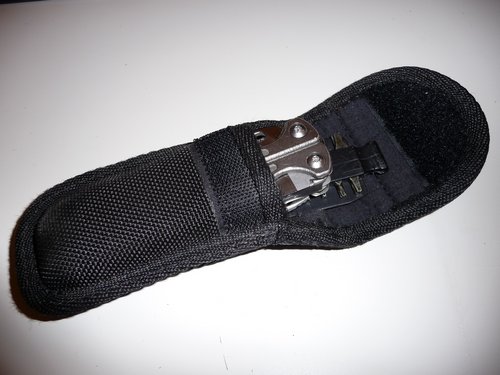
SCHRADE TOOL, nylon alternative sheath (good, used this all the time)
Leatherman Charge TTI within the Leatherman Wave (I) sheath from 2003.
Tool fits, but + bitholder doesn’t :-(
I may not be the only one with this problem, and have in the past used a variety of other sheaths to tackle this problem (tool & bitholder in one place, see SCHRADE TOOL nylon sheath pictured above). There seems to be a market for customized solutions, and while I am sure I could easily get a modified sheath in the US or even Kenya, I just couldn’t find a good sheath in Germany (locally or imported), so I had to make my own. This time I wanted to make a sheath out of leather.
Bought this one (Victorinox L sheath) from eBay which unfortunately is too short.
Now, I don’t know much about leather and do not even own many leather products. Shoes, belts and a pouch/sheath (made from artificial leather) that came shipped with my phone. But still, there’s some sort of magic to this material that will make you want to create something out of it. I was told that my great great great grandparents once owned a tannery, so maybe it’s somewhere in the genes. Sijui.
First step was to surf around and check various online resources for inspirations. I actually already knew what I wanted to build – my first Leatherman Wave sheath from 2003 had set the standard for me. I wanted something like this…. but only bigger.
Next step: leather. Found a very nice & cheap offer for leather stripes (2-3 mm thickness) on eBay, which was exactly what I was looking for.

Ok, now how do I get this material into shape? Does it really require to be formed into shape? And when does this need to be done? Prior to or after sewing the parts together?
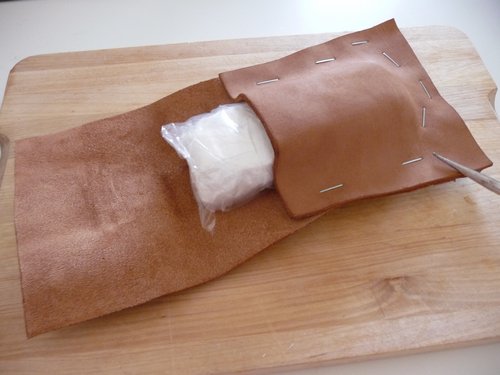
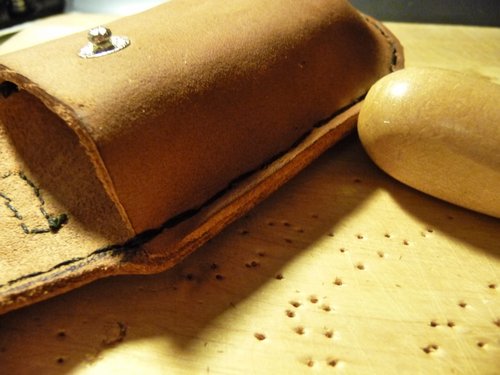
Sometimes you just have to do things your way. If it feels right, do it. So i dampened the leather, sealed the knife and bitholer in a plastic bag and placed it inside the leather which I then pressed into shape. Placed all of it on the heating in the bathroom and waited for it to dry up. Oh, and I used a stapler to hold it all together.

Next morning: leather is dried up and in shape. Great!
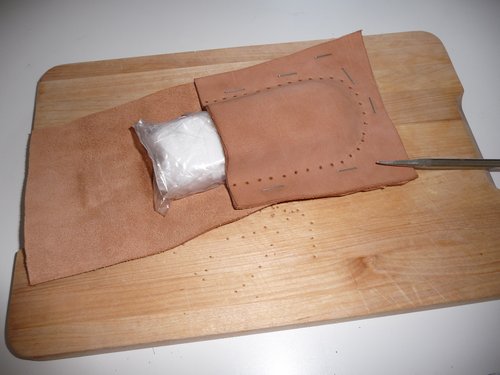
Next step: holes. Lots of them. I think there’s a wheel to mark the correct pitch between the holes, but since I do not own such an advanced tool, I just marked everything by rule of thumb and punched holes with an awl.
front
back
After the first stitches with special leather yarn, I realized that the one I used is too thin (2x, left), so I went for the only thicker one I had (3x, right).
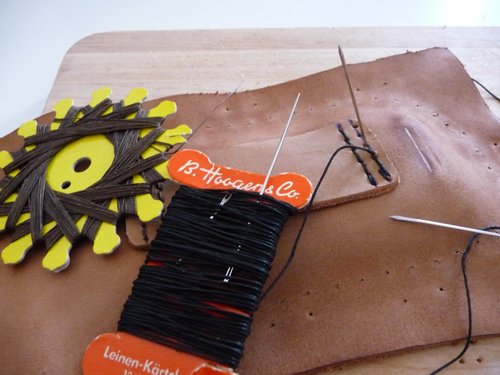
I may not be a professional and my seams may show that I am a bloody beginner, but at least I am using two needles.
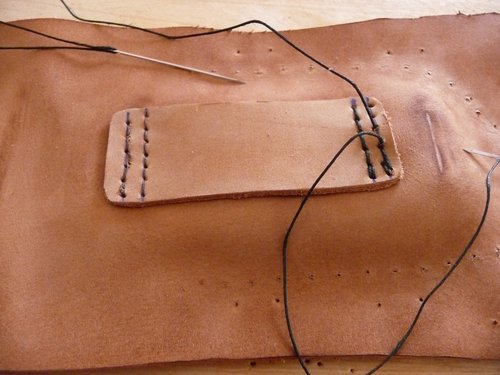
stitching on the left: too thin

both sides
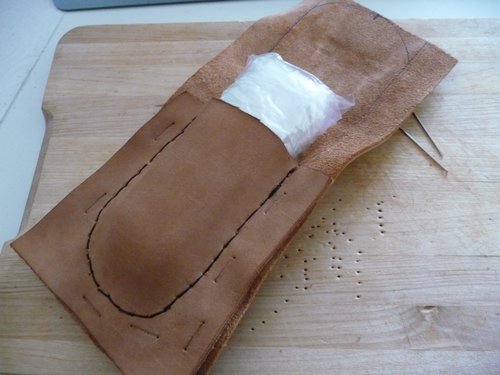
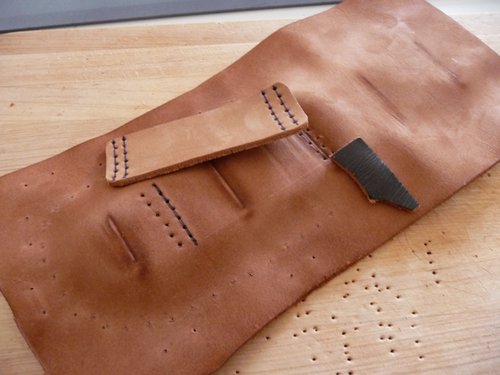
next up: the main seam
big & small, wondering about the design

slowly getting there
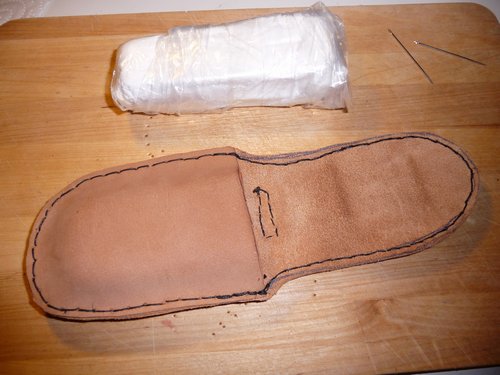
Almost done. The white package contains the Leatherman Charge TTi + the bitholder.
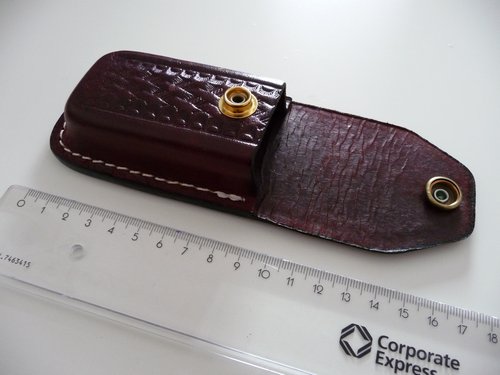
I then dampened the leather again and used the wodden knob to flatten the edges of the leather. Again, I am no expert and maybe there’s a proper way for doing this, but I just looked at the old sheath and realized it had to work out somehow. Well, it did. Edges are smoothened now and quite shiny. Nice!
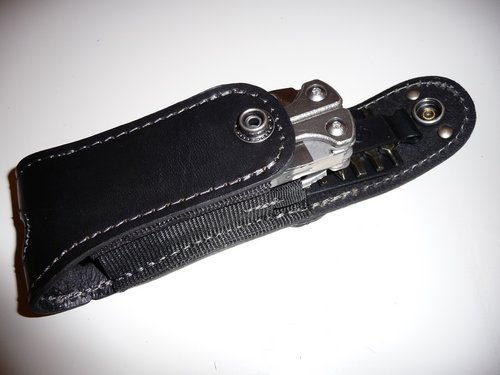
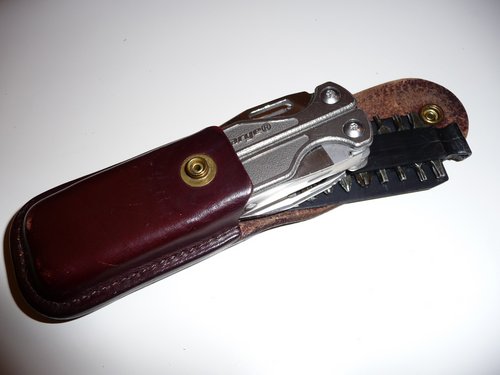
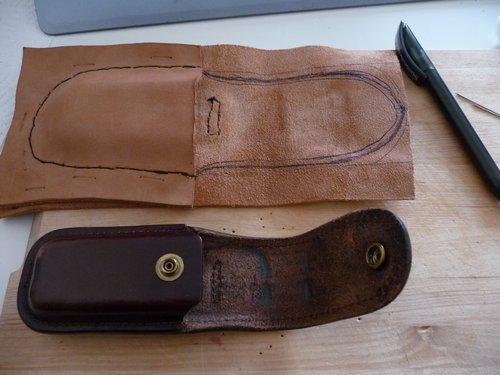
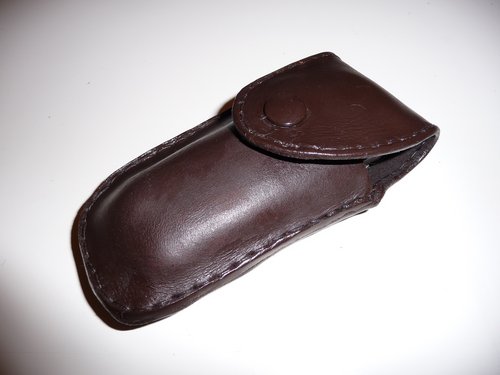
new sheath
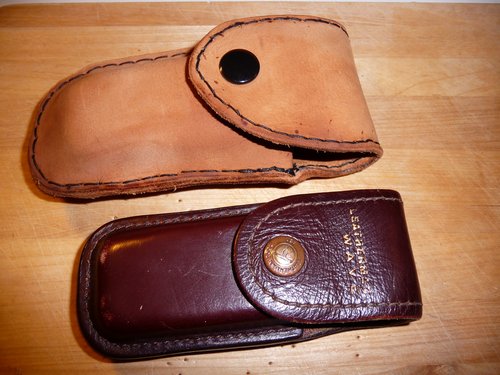
new and old sheath
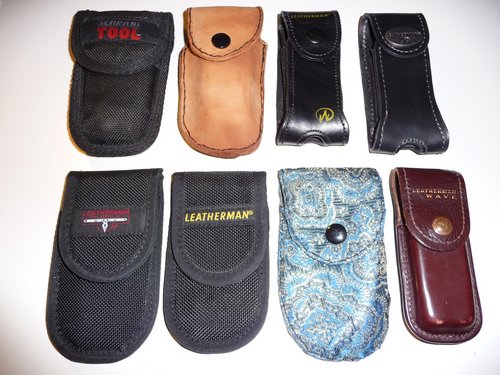
The complete collection: opened and closed.
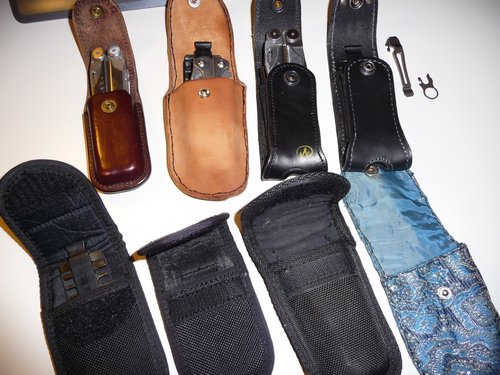
You may note the nylon sheaths. These are also fine but (except for the SCHRADE TOOL sheath) only accommodate the tool itself, not the bitholder. Again, I don’t know why Leatherman does not produce proper sheaths. Something like the dark brown sheath (which imo is the best) from 2003, but bigger. You will also notice my beginner’s style and how dumb my own sheaths (noticed the blue one? :-) actually look when compared to the professional solutions.
One possible solution would probably have been to further apply some wax on the new sheath and darken it. Well, I polished it with some special leather wax, but also applied this dark brown (imo a bit too dark, damn..) leather colour onto it. Looks ok, but I also know what to improve on next time. Ah well… as long as it works it is ok. I really wish someone would seriously teach me a few tricks though, like how to get straight seams. For this, however, I would probably also require a table for my tools and a bench vice.

Working with leather is a fascinating experience!
(Wenn ich nochmal 20 wäre, würde ich mich nach einer Lehre als Sattler/Feintäschner/etc. umschauen. Bin ich aber nicht mehr und habe auch schon eine Lehre hinter mir, das reicht. Als Abendkurs in der VHS wäre eine Fortbildung in Lederarbeiten aber sehr interessant – auch wenn ich im Moment keinen weiteren Einsatzzweck für Lederprodukte habe. Nach dieser Arbeit kann ich aber sehr gut verstehen, wieso es anscheinend ziemlich viele Leute da draußen gibt, die in ihrer Freizeit Leder punzieren (= mitm Hammer Muster ins Leder treiben) und/oder ihren Indianer/Rocker/SM/whatever-Trieb damit ausleben. Is aber alles nich so mein Ding, will ja nur ein passendes Lederetui für meinen Leatherman haben. Ich vermute übrigens, dass man durch versenkte Nähte (Rille ins Leder treiben) und den Einsatz von Stecheisen schon geradere Nähte hinbekommen würde, aber das hebe ich mir fürs nächste Mal auf. Das nächste Produkt aus den verbliebenen Lederresten werde ich aber nicht mehr anmalen, oder zumindest nicht mit so einer dunklen Farbe, auch wenn das jetzt nur auf den Bildern im Blitzlicht so schlimm ausschaut..).
Look what I found in our mailbox today!

(pic is a bit blurry because it was taken with an Apple device ;-)
Apple-fanboy s(ch)wag for an upcoming Apple fan like me. What a pleasant surprise!
All the way from the United Arab Emirates via my dear friend Turbodave.
Asante sana, bro!
Disclaimer: this isn’t the Motter Tektura or Cupertino font, but still comes very close to the original…
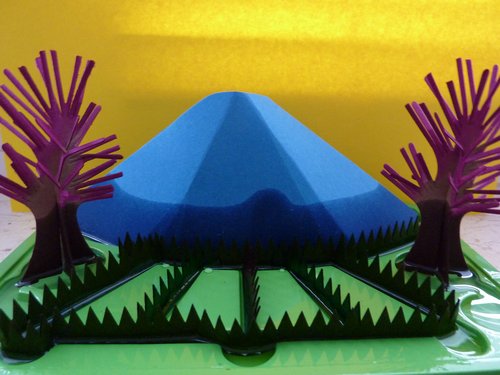
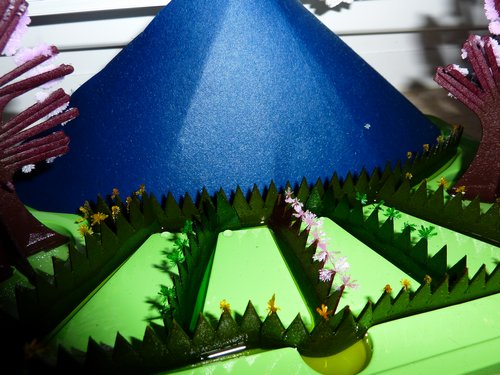
“…the sudare is the thing handed down from their ancestor.” (src)
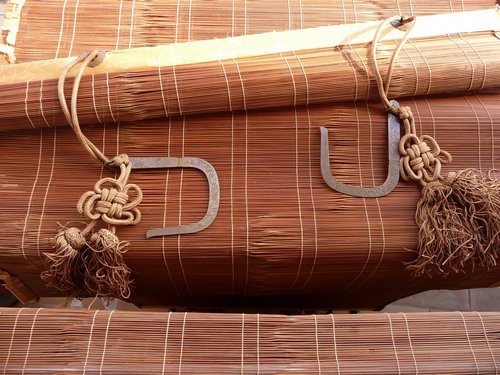
Found this nice quote on a website run by an artisan who crafts and repairs Sudare – Japanese screens. The same artist goes on explaining that:
“…the sudare is basically made from bamboo, but it can also be made from 3 to 4 other types of materials. The word “sudare” is characterized in Kanji by the combination of 2 kanjis: one meaning bamboo and the other meaning “in row.” So “sudare” means “lined-up bamboo.” Well actually, if we break the word “sudare” down, “su” stands for “lined-up bamboo,” and “dare” means “hanging down” because you hang sudare down from the ceiling when you use them. “
And that’s exactly what I am going to do with these screens: hang them up in our living room (in front of the window).
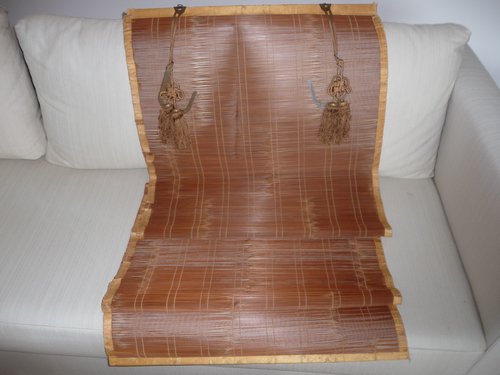
The interesting story and my reason for sharing this is that my parents found them on top of a rubbish container near our house in Tokyo some…30? years ago. An older house in the neighbourhood had been demolished and careless workers threw them away, so the Sudare(s) were free to be picked up.
There’s something about modern Japanese culture and how it conflicts with old traditions that would certainly make up for a lot of interesting blog posts. Fortunately, there are a lot of Japan-related blogs out there that cover exactly this transition between the old and the new worlds.
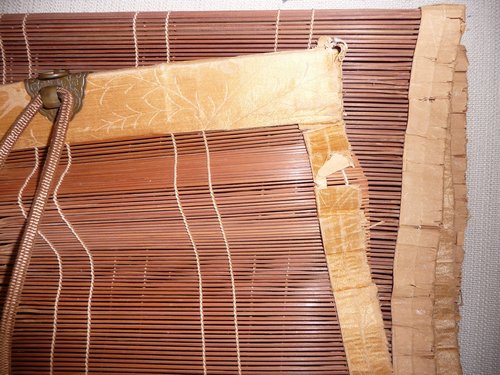
These sudare may look a bit worn out now, also because they were kept in a very moisture basement over the last 5 years, but the bamboo material is still in great shape and 100% ok. The build quality of these Japanese sudare is just amazing – even though they may be about 80+ yrs old!
I will buy some golden tape to repair the seam at the sides.
Going home-home for an extended weekend actually means I can waste spend some time on my old computer and enjoy the following (Kenyan) sticker on the keyboard:
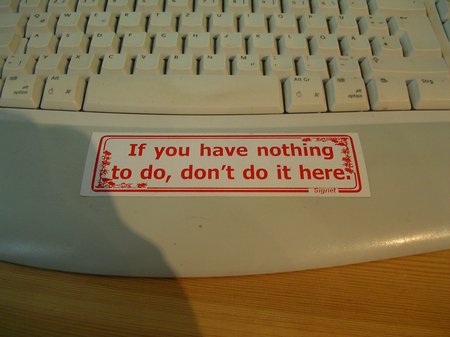
This computer urgently needs to be fixed (Ubuntu on a USB key is a wonderful life saviour), but I was actually much more interested in rummaging in those drawers under the table.
It’s almost 4 years ago that I published my first post on this blog.
The facts:
Blogging is easy. Go to WordPress.com (or any other blogging platform), choose a username, register a blog and start writing. And publish it.
Do it anonymously, put your name under it -just do as you feel. But make sure your voice is out there.
My mother once asked me “JKE, who’s supposed to read all this stuff??”. – “Well”, I replied, “…I don’t know. But some apparently do.”.
That would be you, dear readers. Without you and your comments, I would probably never have taken it to this level. I owe you big times!
—
Four other things I’ve also learned during the last 4 years:
1. A blog post without a photo is like chicken soup without chicken. You feel that something is missing. So here’s the mandatory and totally random picture:

2. The world is changing faster than expected. And we will need much more visionaries out there who are able to think out-of-the-box and and are willing to take a risk. Even if it means that everyone will start laughing about them.
I wouldn’t say I am a visionary, but I’ve followed my own path during the last 4 years and am happily working freelance now on projects I really like. I like my work and what I do. Do you?
3. Things I value the most: time, inspiration, freedom.
4. Everyone likes a good story. Had this colleague at work who kept on sending me links to “potentially interesting news” for our newsletter: “Here, this link is interesting”. – “Yeah, thx…”, I replied, “but where’s the connection and where’s the story to it?”. Silence.
Twitter taught us that news may be limited to 140 characters only. 140 characters that will either be read or ignored.
Now, scientists can sometimes be very complicated. Blogging really helped me shrinking news to a necessary length – and I am still only at the beginning. I wish that colleague would twitter.
Epilogue
SEO is a horrible buzzword, suitable for bullshit bingo. Thinking about this blog post, I keep on adding new stuff to the list of facts. 4 years are an interesting timeframe to draw a line and look back. Alas, this aim to categorize the blog with something else other than “personal” still remains the hardest part for me.
Heute habe ich mir endlich einen Traum erfüllt und einen ferngesteuerten Hubschrauber gekauft, mit dem man im Zimmer herumfliegen und seine Mitbewohner (Frau, Hund, Katze) in den Wahnsinn treiben kann.
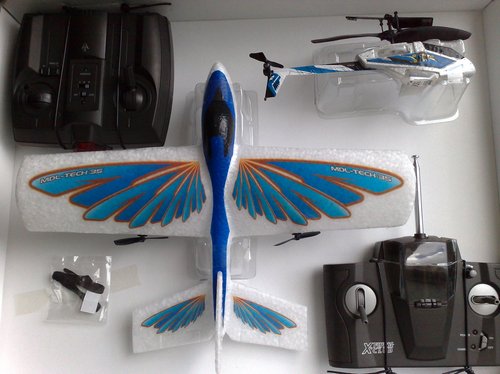
An dieser Stelle auch gleich das große ABER! – denn bei diesem ultraleichten Spielzeug aus Hartschaum und nur popeliger IR-Fernbedienung kann natürlich keine große Freude aufkommen. Jedoch, als Einsteigerset ideal und richtig interessant wird es dann wohl erst ab 99,- EUR mit dem E-Sky Lama V4 oder vergleichbarem.
Das abgebildete Set gab es günstig im Laden und nachdem ich den Kauf bisher immer verschoben hatte (“ach, brauch ich nicht wirklich”, “einmal gespielt und liegt dann in der Ecke”, “kostet nur Geld und bringt nix”, “hmm, nen HeliSimu fürn PC wäre auch fein…was kostn nen USB-Controller?”, etc.), hab ich mir dann heute gedacht: WTH? Nich lang schnacken…einfach mal kaufen und wenn scheisse dann halt Pech gehabt.
Dass wir uns nicht falsch verstehen: so ein Billighubschrauber mit 2 (3-) Kanalsteuerung kann natürlich nur hoch- und runterfliegen, sich schön im Kreis drehen bzw. gegenlenken und mit etwas Glück und bißchen Einstellungsgeschick zum Geradeausflug bewegt werden. Der Flug nach vorne interessiert mich aber gar nicht so – vielmehr das Schweben auf einer Stelle. Und das kann auch dieses Gerät (mit etwas Übung und Ausrichtung des Heckrotors).
Für dieses Kombiset aus Hubschrauber und Flieger hatte ich mich eigentlich entschieden, weil der Flieger im Gegensatz zum Heli mit einer Funkfernsteuerung ausgestattet ist und ich diese noch für ein weiteres Projekt verwenden kann.
Als Kind wollte ich immer ein ferngesteuertes Flugzeug haben, aber damals waren diese Bausätze noch ziemlich teuer. Erst seitdem es diese günstigen Fertigmodelle gibt (an denen man auch relativ wenig einstellen kann – was gut und zugleich auch schlecht ist), ist das Ganze erschwinglicher da populärer geworden.
Trotz des schlechten Gewissens, mit dem Kauf dieses Spielzeugs wieder Sondermüll Made in China gefördert zu haben, ist so ein Gerät die perfekte Entspannung für Zwischendurch.