Particulate Matter Pollution

PM sensor
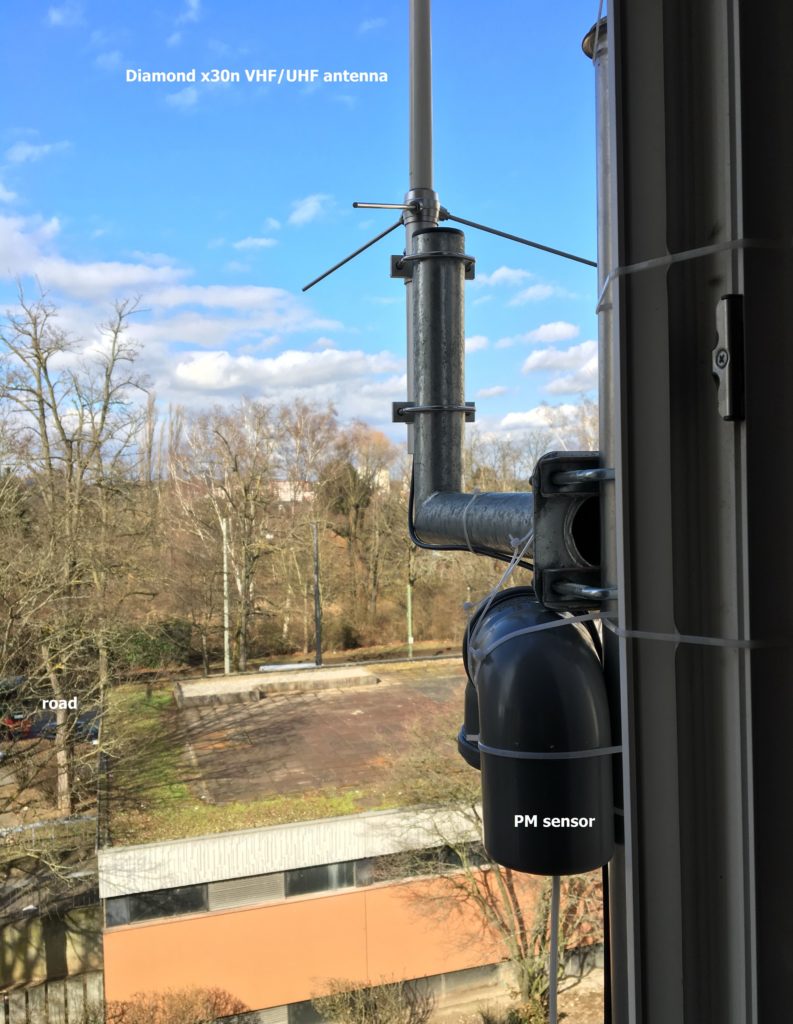
The PM sensor (hidden in a grey pipe) mounted next to my Diamond x30n VHF/UHF antenna. A bit ugly, but we are on the 4th floor, so it doesn’t really matter and the windows are closed all day long.

There may be worse places on earth when it comes to Particulate Matter (PM) Pollution, but I happen to live next to a busy road with daily traffic jams and, as a consequence of that, have a dusty room that I need to clean almost every day. I also read about expats in countries like China or India who are complaining about the air quality in those places and who meticulously invest in good air filters for each room in their appartments. Good air filters are expensive! Hence, clean air seems to be be a commodity that also comes with a commercial value among other attributes. We take it for granted but complain when it isn’t available. And another issue with clean air is that you often don’t see the pollution – only the results. Polluted air reminds me of radioactivity or unhygienic surfaces: you don’t see it, hence can’t estimate the potential danger. That’s why a sensor to measure the Particulate Matter Pollution yourself is an approach to this open question. Continue reading “Particulate Matter Pollution”

Endlich Funkamateur

Ein Funkamateur, der das Hobby Amateurfunk betreibt. Also mit erfolgreich abgelegter Amateurfunkprüfung bei der Bundesnetzagentur und zugeteiltem Rufzeichen.

Die erste Berührung mit Funkgeräten waren japanische (CB)-Funkgeräte in ca. 1980. Ich habe die immer noch, natürlich stark zerbastelt, liegen in einer Kiste im Keller. Dann ca. 1985 bei einem Sommerkurs in der Bremer Kunsthalle: ein Kurs, in dem wir uns mit wenigen Bauteilen auf Reißzwecken ein Radio gelötet haben. Empfangsdraht an die Heizung, Stöpsel ins Ohr, bißchen drehen irgendwo, zack, der erste Sender im Ohr. Später dann – in Kenia – der erste Elektronikbaukasten, als sog. Short Wave Listener (SWL) täglich Radio hören, mit 18 irgendwann das erste Amateurfunk-Handfunkgerät in der Hand: Standard C168, das der mittlerweile leider verstorbene Funkamateur Hermann (DK8RT/5Z4RT) aus Deutschland organisiert hatte. “Wenn Du damit funken willst, musste aber die Lizenz machen.” Yo, will ich. Funkgeräte sind verlässlicher als die Telefonleitung im Haus, die in jeder Regenzeit den Geist aufgibt. Mobilfunk gibt es in Kenia zu der Zeit nur nach ETACS-Standard, für das in Kenia nur 2000 Leitungen/Nummern im System vorgesehen waren. Zwischen den vielen illegalen Kurzwellensendern aus Somalia sind auch etliche Funkdienste in Nairobi auf VHF unterwegs, die größtenteils keine Betriebsfunkfrequenz beantragt haben. Alleine, sie fallen weniger auf als die dicken Geländewagen der Vereinten Nationen mit ihren Kurzwellenantennen an den Stoßstangen. In einem Land ohne verlässliche Normen und funktionierender Infrastruktur sind autarke Kommunikationsmittel wie Funkgeräte eine sinnvolle Investition.

Standard c168
Nicht unser Auto, dafür mit etwas längeren Haaren, hippem FjällRäven-Rucksack und dem geliebten Handfunkgerät Standard c168: JKE in ca. 1994 bei Maralal in Kenia.

Continue reading “Endlich Funkamateur”

JKE is GTD, part 3 #X17

Almost seven years after my first two posts on “Getting Things Done” (GTD), I have to admit that the digital switch only partially worked for me and that I am still using endless pages of loose notes to organize my life.

an example of my notes
The true reason why the iPhone bends.

Continue reading “JKE is GTD, part 3 #X17”

Schöne neue Welt

Der HiFi-Bereich ist so etwas von tot.

Das hat man zwar schon vor einigen Jahren bemerkt, ich habe es aber erst heute richtig verstanden, als ich für die Reparatur eines sehr schönen Infinity Primus 200 Lautsprechers (des Kollegen @sauerstoff) dringend eine neue Hochton-Kalotte organisieren wollte.

Infinity Primus 200

Nach einer gefühlt halben Stunde Wartezeit in meiner Love/Hate-Filiale Conrad Elektronik in Frankfurt hieß es dann nur noch “Haben wir aktuell nix da, muss bestellt werden”. Schublade auf, und tatsächlich: alles leer.

Immerhin konnte mir ein weiterer Laden um die Ecke genannt werden, der aber auch nur auf Bestellung Ersatzteile ordert. Macht wirtschaftlich sicherlich Sinn, rechtfertigt dann wohl auch evtl. höhere Reparaturkosten, ist aber ein Grauen für jeden Bastler. Immerhin reden wir hier von einem 16 EUR Universal-Bauteil, dass bis vor kurzem zu jedem gut ausgestatteten HiFi-Laden gehörte. Es ist ja auch kein Abspielgerät, dass durch neue Modelle verdrängt wurde, sondern ein Bauteil für Lautsprecher, die man immer noch braucht.

An dieser Stelle könnte jetzt ein ganz wunderbarer Rant über die immer mehr erkennbare Obsoloszenz der uns umgebenden Konsumgüter stehen – allein, es bringt ja nix.

Die Nachfrage regelt dann doch das Angebot und das neue Gerät kann oft mehr als das Vorgängermodell. Eine Reparatur defekter Geräte lohnt sich oft nicht, die Reparierbarkeit wird bei modernen Geräten bauartbedingt immer mehr erschwert und so ist es nicht verwunderlich, dass sich auch das Konsumverhalten entsprechend ändert.

Und doch gibt es seit einigen Jahren diesen Trend hin zu DIY/DIWO (Do It Youself/Do It With Others), der auch schon vorletztes Jahr bei der DIY-Ausstellung in Frankfurt als Mitmach-Revolution gefeiert wurde. Dies steht ganz im Gegensatz zu einer Bastelkultur, die vor allem aus einer Mangelwirtschaft entstanden ist (vgl. DDR, AfriGadget et al). Es bleibt daher abzuwarten, wie sich dieser Trend der letzen Jahre auch auf die Verfügbarkeit von Ersatzteilen auswirken wird*.

Hackzentrale
Getrieben von dieser Ausgangssituation haben wir uns gestern Abend im Co-Working-Space/Hub “Die Zentrale” in Frankfurt getroffen und die Hackzentrale gegründet.

Wir – das sind interessierte Bastler im Frankfurter Raum, denen der (sehr empfehlenswerte) Hackerspace Frankfurt zu nerdig/speziell ist und die gerne gemeinsam Dinge reparieren wollen. Eine Art Repaircafé, wie es aus anderen Städten schon bekannt ist, aber ohne diesen ganzen Schwung an Verpflichtungen, die ein solches Modell mit sich bringen würde.

Aus meiner Sicht als Freizeit-Bastler kann das eine sehr schöne Veranstaltung werden, die zugleich auch das Konzept des Co-Working Spaces der Zentrale hervorhebt: gemeinsam arbeiten, voneinander lernen und sich gegenseitig inspirieren. Und natürlich soll es nicht nur um die Reparatur defekter Geräte gehen, sondern auch um kreatives Basteln und das Herumspielen mit neuen Gadgets.

Bei der re:publica13 Anfang Mai habe ich von den Freunden bei AfriLabs das Modell der “Community Currency” vorgestellt bekommen. Das ist eine Art geldwerten Beweises für Nachbarschaftshilfe – allerdings in einer angepassten Form. Die Umsetzung so eines Vergütungsmodells ist aber immer etwas problematisch – beim iHub in Kenia hatte man das anfangs auch versucht, dann aber schnell aufgegeben (= wer mehr für die Community macht, bekommt mehr Nutzungszeit des Coworking Spaces gutgeschrieben). Bloggerkollege Finn war übrigens auch dabei und hat uns kurz etwas zum Tauschring Bockenheim erzählt, der schon seit über 10 Jahren erfolgreich funktioniert.

Frankfurt braucht eigentlich ganz dringend ein eigenes FabLab, aber solange verrückte Mieten der Rentabilität einen Strich durch die Rechnung machen, müssen die FabLab Dienstleistungen eben dezentral angeboten werden. Der Marcus Link von Manupool bietet daher bereits 3D Drucker Workshops an, bei denen die Teilnehmer einen 3D Drucker als Bausatz aufbauen können.

“Ich kann mir 3D-Objekte von dieser Website herunterladen und hier real an dem 3D Drucker ausdrucken”, begeistert sich einer der beiden Gründer der Zentrale über den 3D-Drucker. Mal eben aus einem PLA-Kunststoff ein abstraktes Gebilde ausdrucken können, das man vorher am Computer geöffnet hat, ist schon ein sehr wunderbares Gefühl, das sehr viele Möglichkeiten bietet. Wie sehr hätte ich mir das in den 1990er Jahren gewünscht, als wir in Kenia die elektrische Schreibmaschine für ein halbes Jahr zur Seite stellen mussten, weil ein kleines Kunststoff-Zahnrad gebrochen war. Heutzutage wäre das kein Problem mehr.

Eben genau diese Kerbe der vielen Möglichkeiten wollen wir mit der neu geschaffenen Hackzentrale vertiefen. Ersatz-Hochtöner wird es wohl nur noch auf Bestellung geben, aber vielleicht werden wir uns diese in einigen Jahren auch schon selber drucken können.

Der nächste Termin für die Hackzentrale im CoWorking Space Die Zentrale in Frankfurt-Bornheim steht noch aus, wird dann aber sehr wahrscheinlich online unter http://www.hackzentrale.de zu finden sein. Die Teilnahme ist kostenlos, es wird aber auf Mitarbeit wert gelegt. An dieser Stelle auch ein großes Dankeschön an die beiden Gründer der Zentrale – Jenny Krutzinna und Lukas Koerdt – für die Initiative und Bereitstellung der Räumlichkeiten!

Den gesuchten Hochtöner habe ich jetzt übrigens bei eBay bestellt.

[* Ersatzteile: das Sortiment hat sich geändert. Ähnlich wie beim Lego verschmelzen Hard- und Software immer mehr. Elektronikanbieter wie Conrad oder Pollin werben immer mehr mit Bausätzen wie dem Arduino oder dem Raspberry Pi. Weniger Ersatzteile, mehr modulare Bauteile, die zu einem System gehören und miteinander kombiniert werden können. Ich betrachte das noch etwas skeptisch, weil mir dadurch systembedingt zu viele Vorgaben gemacht werden, aber auf der anderen Seite müssen wir genau diese Kombination aus Hard- und Software noch mehr fördern und müssen es auch mehr als Entwicklerplattformen verstehen, die eine andere Ausgangsbasis darstellen und natürlich jederzeit erweitert werden können.]
Capacitorgalore

The following may be old news to some of you, but I found it interesting enough to share it via this blog. Also, because there may be others out there who have a faulty TFT screen. Apologies also for the poor picture quality – taken while in action, with little regard for potential blog content.

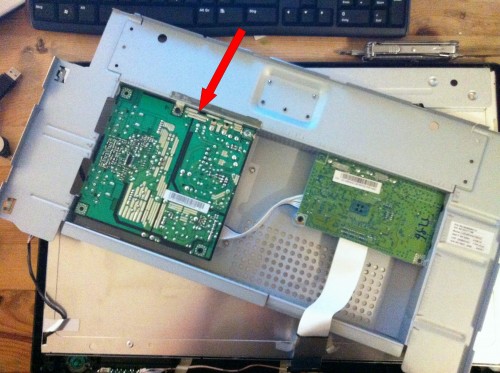
“You can have my old 22″ TFT Samsung display”, a friend of mine recently told me. “It’s somehow broken as it often doesn’t show a picture, sometimes only after a while, but in most cases it’s just dead”, he wrote. “I will throw it away or you come and pick it up.” So we picked it up.

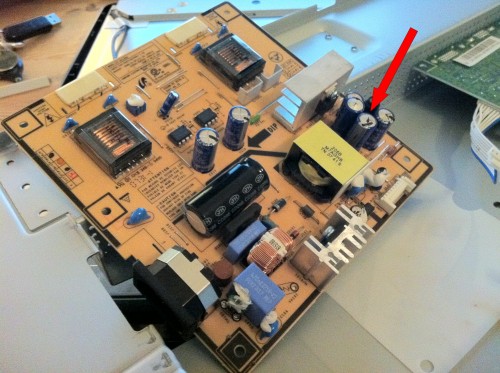
It was the first time I opened such a huge TFT and also the first time I immediately found the cause of this failure: worn out electrolytic capacitors. A quick Google search then revealed that these capacitors are indeed the culprits, and that I am not the first one who has a problem with such a Samsung display. In fact, there’s a complete shop online (in German) that only sells electrolytic capacitors for each Samsung display and other devices. That’s pretty amazing considering that Samsung probably lost a great share of their reputation due to saving on these relatively cheap components. Alas, this unfortunately also happens with a lot of their competitors and I think it’s all part of the planned obscolescence.

So the good news is: you can fix it.

If you own a soldering iron, you can just buy a set of electrolytic capacitors and replace them yourself, or get a new/refurbished AC power supply unit board from a dealer in China via eBay and just swap these boards. There are just six screws and a lot of people have this done before and successfully repaired their TFTs.

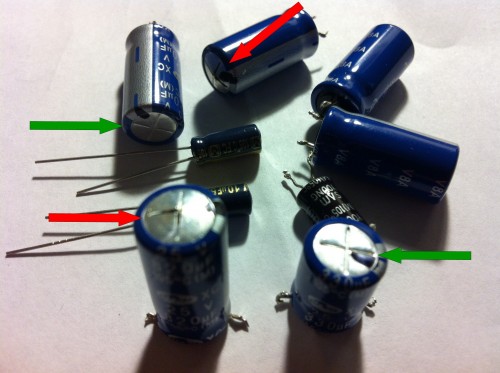
On the pic above you’ll see the old (blue) capacitors of which some are obviously broken – something known as “capacitor plague” – with open vents in the top of the can. You sometimes also don’t see the damage, so if you’re replacing some, it may also be smart to just replace all of them with a brand of higher quality. Such higher quality capacitors are visible in the picture – two small black ones (in the middle) which I didn’t replace for technical reasons.

All in all, just a repair of 20 minutes. Or if you have a replacement for the power supply unit board, it’s even quicker.

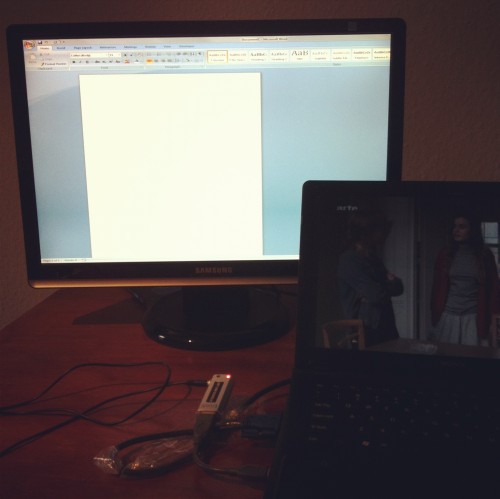
Et voilà, the fixed display, just moments after the repair was done. Again, anyone can do this and if it can be fixed, then please fix it. Some things are just very straightforward and simple.

I also never knew that the Capacitor Plague did have SUCH an impact, that there are sites dedicated to capacitors and that the cause for all of this (which is said to be industrial espionage) is in fact very far-fetched.

Hey Apple, this is your chance!

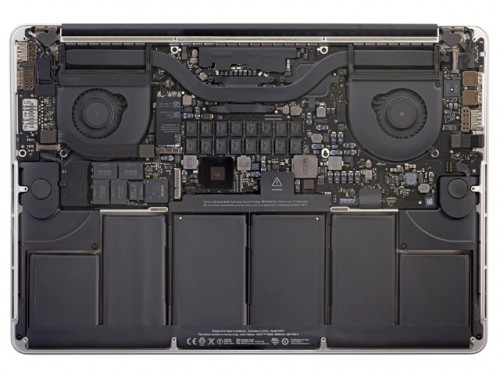
You may have followed today’s news via iFixit or Mashable that the new Apple Mac Book Pro with the Retina Display will contain almost no repairable parts. Much like the iPads, I believe, even though there are still spare parts available for those.

I am always blown away by the amount of engineering found in Apple products, especially compared to the “modular” competitors (i.e. Dell, Lenovo and HP) whose spare parts are still available on eBay & Co. long after their laptops are out of production. Parts fail, displays break, rubberised touchpad buttons wear off, hinges and keyboards wear out and so on.

the opened new MacBookPro Retina, image via iFixit.com

Not so the new MBP Retina (pictured above) which seems to have no repairable parts at all. In case of a hardware fault, most customers are supposed to return it to Apple. My DIY-heart of course yells at this (“I will fix it anyways!”), but I also understand that this step is part of their marketing and quality management.

The battery? Well, as far as I understand there are two main reasons why it would need to be replaced: heat and constant overcharging. And as far as I am informed, this overcharging is prevented by a circuit otherwise only found with previous ThinkPads from IBM/Lenovo. So it seems like there is no reason to have the battery replaced during the first 2-3 years of use.

Ok, and then? What happens after 2-3 years of use when the next generation of MacBooks is waiting on the shelves? That’s the time when most gadgets are turned in for repairs, I think. Repairs that are expensive because they often won’t be covered by a manufacturers warranty.

Here’s the idea

Given that Apple already introduced this “no maintenance required – if broken, we’ll fix it for you”-concept in the past but only nailed it with the almost non-repairable iPad, Apple customers are assumed to be mainly users – instead of tinkerers*. So, obviously, many customers are already used to this concept and would have no problems exchanging their beloved machines for a new one (except for extra costs where applicable).

Now, instead of selling the hardware, the idea would be to only lease out the hardware to customers for a given time frame of 2-3 yrs and then have them return it to Apple.

The benefits

  • Apple could start using better / more expensive materials because all hardware is returned to the manufacturer, remains in a technical loop
  • A recycling is possible = less material costs, less dependency on rare earth metals from China & Co
  • Apple benefits from real world scenarios, has complete control over usage (I know they like that), design teams can pick up on this for further improvements
  • Customers won’t have to cough up USD 1000-3000 at once but pay monthly installments instead (by default!)
  • Apple has the financial resources to take this “risk”
  • Customers get a new machine every 2-3 yrs, consistent market
  • User data is more attractive than hardware: care for home folder, everything backed up in the Cloud
  • Software is the bigger market than hardware (I think): make them stick to an OS and then provide them with apps (see the iPhone – works like a charm on iOS!)
  • Customers won’t have to worry about the hardware as it will be replaced

Heck, if Apple doesn’t do that, someone else should do it. Not the leasing as such but this whole model of ownership – because, after all, with Apple’s latest design we are just users, not tinkerers anymore. Just as we stopped buying complete music albums and go for single mp3 tracks instead, this concept of “ownership” is totally different to the one we had in the past. Maybe not for you or me, but for those a few years younger than us.

I believe that Apple has the right approach and I would like to encourage them going a step further with this Cradle-to-Cradle-inspired proposal. It’s all about having a sound business and still doing good.

*tinkerers: most Apple users I know bought their Apple products because they don’t want to mess with the system or any components. So while they may just be into that DIY-stuff as I am, their Apple products often remain as they are. Not because they couldn’t, but because they don’t want to.

(this Mashable post on G+ inspired me to this blog post)

Best of Kiambogo Tapes

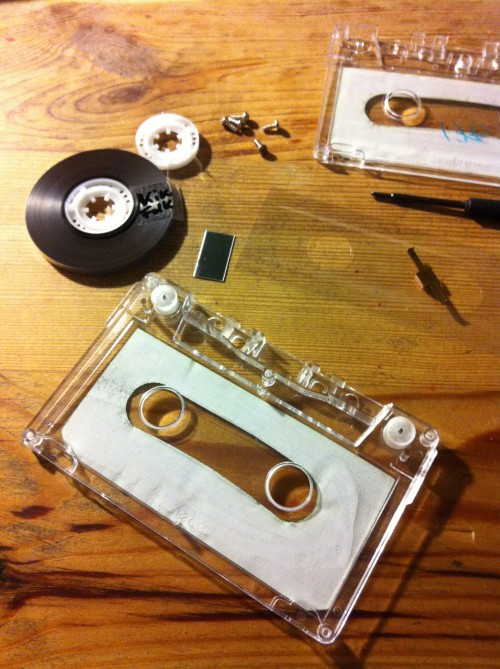
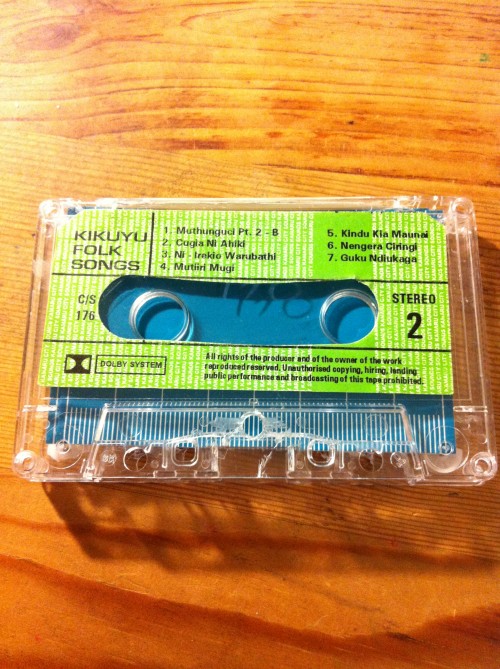
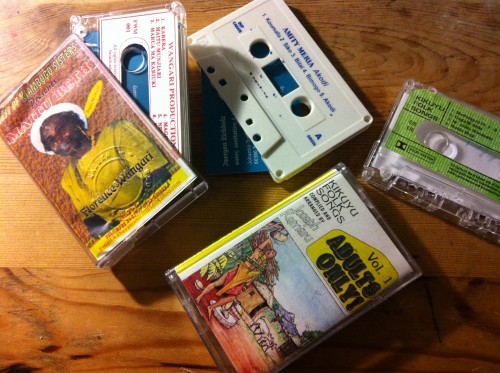
I recently shared this wonderful link to an Instructable hack via Facebook, aptly titled “Cassette Tape Business Card Holder” – which prompted another German-Kenyan friend of mine to share her beloved Kamaru (.KE), Florence Wangari (.KE) and Amity Meria (.BF) tapes with me – so that I would turn them into cool business card holders.

Prior to the introduction of mp3 in the early 1990s, I considered my tape/cassette collection large. But most of these were just copies and/or recordings from the radio (that’s what we did back in the days). So I lacked cool covers. Lea, the friend with the cool tapes, obviously doesn’t like Florence Wangari’s Gospel and knew she’d be in for a cool mod:

“Start with a cool tape, like these.  And no, don’t be horrified that this “museum piece” Apple data tape is being destroyed–no one ever saw it when it sat in a drawer!”

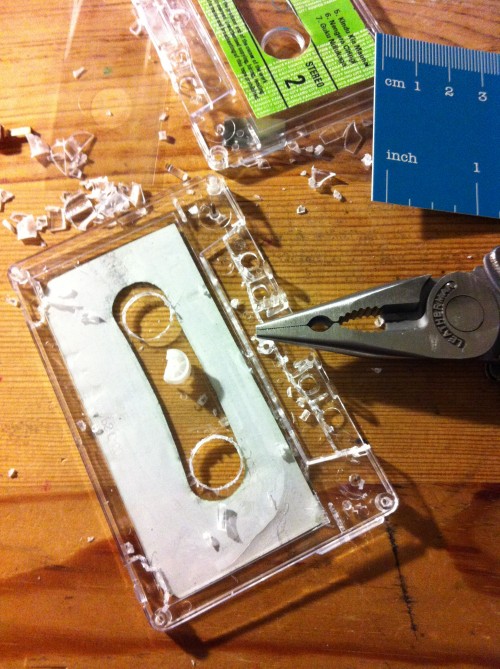
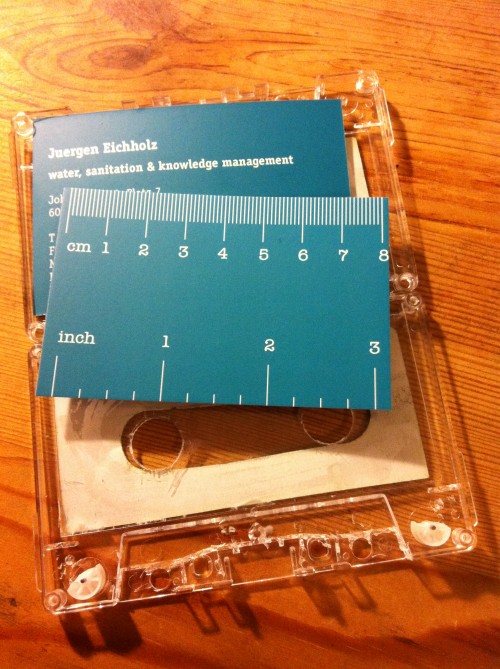
..writes the creator of this instructable. And there’s one more thing I’d like to add: the best covers for this mod are those made out of softer plastic. I am not really sure about the materials used on these cassettes, but I guess it’s PE for the softer and PP for the (cheaper) transparent ones. Anyways, if you’re planing to do this, try what works best for you. And make sure your business card will fit! My current one is from Moo.com and doesn’t fit as good as the white one of my Indian flat mate:

The tapes are well preserved, btw! @Lea: you’ll find them included in the envelope :-)

Just where would I be without my Leatherman?

N.B.: the ruler on the backside = reason why I love moo.com. You won’t keep the business card of some regular dude in your pocket. But when it comes with a cm/in ruler, a simple piece of paper may have some added value.

“Kikuyu Folks Songs” – how epic is that?

Adults only!

Motorola DEFY docking station (DIY)

JKE Motorola DEFY docking station project
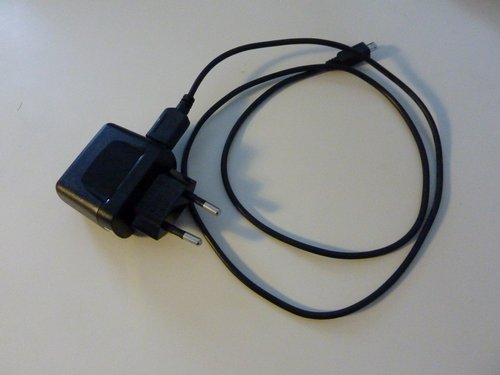
The Motorola DEFY ships with a simple (bulky) charger & a micro-USB cable.

Docking stations for mobile devices may not be on everyone’s agenda, but since I am working from home most of the time and also use a docking station for my HP laptop, I prefer these convenient solutions to have the phone (or any other mobile device) charged when I need it. Besides, I’ve also used such docking stations for my previous phones, so I made sure I’d get mine for this new phone.

The problem: there’s no docking station available for the Motorola DEFY, even though it has been on the market since November 2010 and has since then sold quite well.

There’s an offer on eBay for such a third party docking station from China, set to be available from March 2011 onwards – or later, because the same was also said in Decemeber and January and the release date has been postponed more than once.

Another issue is that the micro USB port is covered by a little flap, so you’ll always have to move it to the side while accessing the USB port. It may be against this background that third party manufacturers haven’t come up with a docking station for the DEFY as of yet.

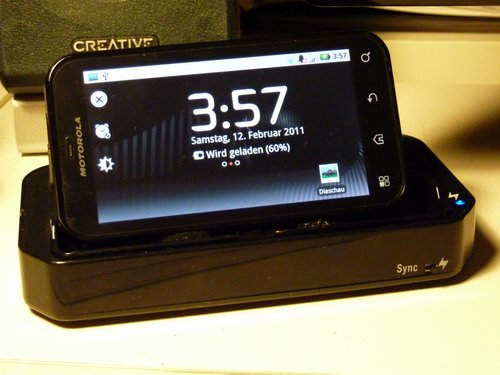
The solution: build your own by modifying one made for the Motorola Milestone. Such Milestone docking stations like the one below currently sell for 10,90 EUR via eBay.DE (incl shipping), which is ok.

JKE Motorola DEFY docking station project

Now, the beauty with these phones is that they flip the screen when you insert them into such a docking station – and display a special screen with access to basic functions like alarm, gallery, media, etc..
In fact, it has two screens – one for desktop docking stations and one for car mounts. You can manually activate the car mount display (huge buttons with access to the navigation system, telephone, music, etc. – very nice, see previous post with bikertech.de image) via a link on the home screen, but I am still to find the link on the menu for this desktop docking screen.

With this docking station, the screen automatically rotates and shows the docking screen. How’s that done? SIMPLE! The phone responds to a magnet which I’ve mounted inside the docking station. In fact, this docking station also came with a small magnet for the Moto Milestone, but it never worked, so I used one of those neodyanamic magnets from last week’s MAKE: LED Throwies DIY project during our local Frankfurt Ignite event wich does the job quite well. You insert the phone et voilà, the screen rotates. Perfect!

Here’s what I did:

JKE Motorola DEFY docking station project

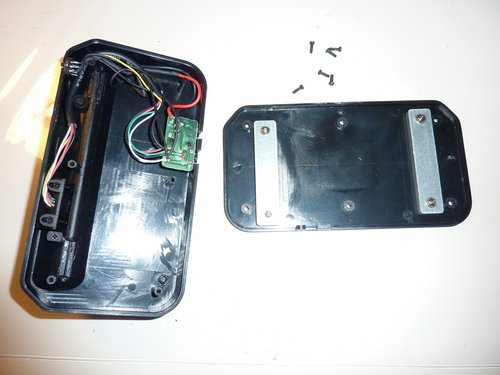
Removed the covers on the screws.

Motorola DEFY docking station DIY « Kikuyumoja

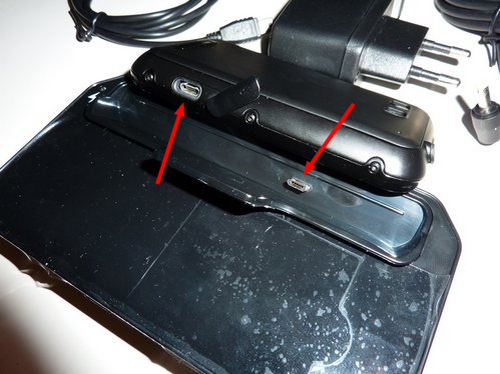
The position of the micro-USB port on the Motorola Milestone obviously differs from the one on the DEFY :-(

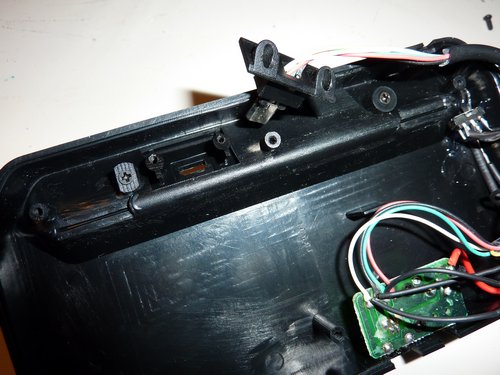
Let’s open it up and see what’s inside:

JKE Motorola DEFY docking station project

JKE Motorola DEFY docking station project

The micro-USB plug is screwed to the plastic frame – good! Let’s remove it….

Motorola DEFY docking station DIY « Kikuyumoja2

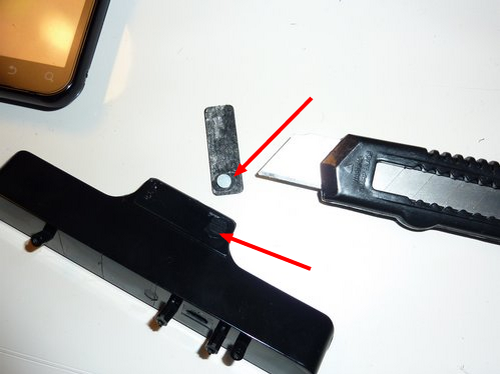
The old magnet from the Milestone docking unfortunately didn’t work for the DEFY…

JKE Motorola DEFY docking station project

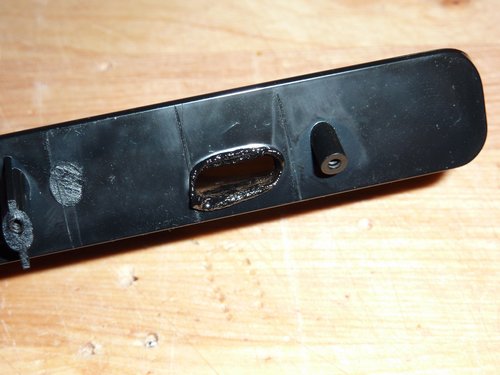
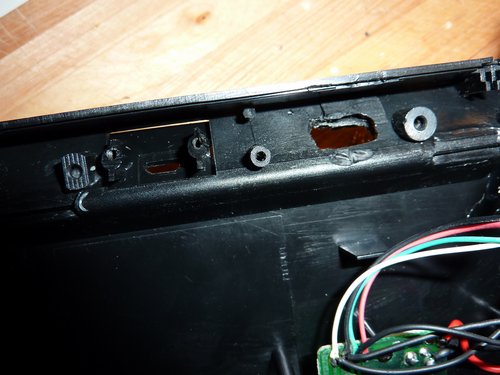
Ok, now this is what you do when you don’t have a Dremel ;-)

(using your soldering iron – very jua kali, but hey, it worked….)

JKE Motorola DEFY docking station project

So I “drilled” a new hole for the USB plug…

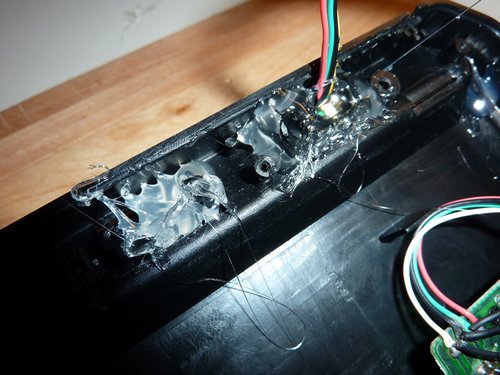
JKE Motorola DEFY docking station project

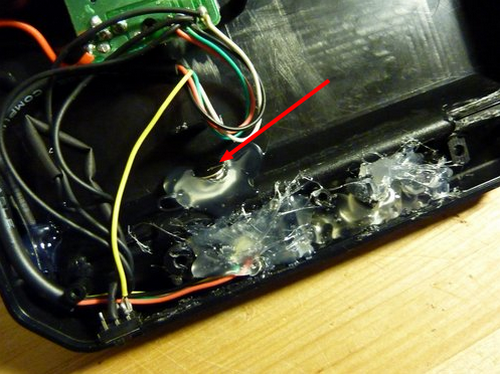
…and fixed everything with hot glue (nasty stuff).

Motorola DEFY docking station DIY « Kikuyumoja3

Can you see the magnet in the middle?

Ok, let’s put the bottom cover back on and turn it around:

JKE Motorola DEFY docking station project

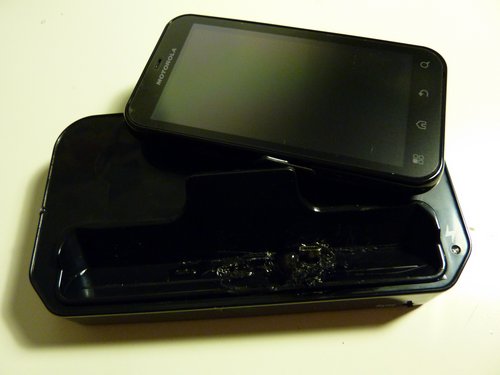
It may not look that nice…..

JKE Motorola DEFY docking station project

..but the final result it good, works fine & makes me happy! :-)

This DIY project is based on an idea I picked up on a German Android forum, which also has a pic of where the magnetic sensor is located inside the Motorola DEFY. Btw, the 2 screens for the docking station (a) this view (as above) and b) the car mount view) only depend on the polarity of the magnet. Flip it over and the other screen will load. Obviously, this isn’t possible with my construction because I’ve glued the magnet to the plastic frame. But you get the idea and may want to use it on your own DIY car mount….

And yes, this docking station will certainly never be as elegant as the slim one for the iPhone, but it fits the phone and does what its supposed to do. Also, there’s something about Motorola I will never understand. The hardware and build quality they offer is terrific! But anything beyond that like adopting the open Android approach (i.e. open bootloaders) or cooperating with third party accessory dealers – nada. Motorola, to me, is like a headmaster of a conservative school that prefers adults (business customers) only. Very strange…