
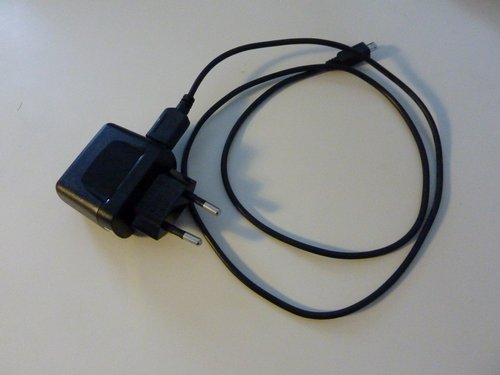
The Motorola DEFY ships with a simple (bulky) charger & a micro-USB cable.
Docking stations for mobile devices may not be on everyone’s agenda, but since I am working from home most of the time and also use a docking station for my HP laptop, I prefer these convenient solutions to have the phone (or any other mobile device) charged when I need it. Besides, I’ve also used such docking stations for my previous phones, so I made sure I’d get mine for this new phone.
The problem: there’s no docking station available for the Motorola DEFY, even though it has been on the market since November 2010 and has since then sold quite well.
There’s an offer on eBay for such a third party docking station from China, set to be available from March 2011 onwards – or later, because the same was also said in Decemeber and January and the release date has been postponed more than once.
Another issue is that the micro USB port is covered by a little flap, so you’ll always have to move it to the side while accessing the USB port. It may be against this background that third party manufacturers haven’t come up with a docking station for the DEFY as of yet.
The solution: build your own by modifying one made for the Motorola Milestone. Such Milestone docking stations like the one below currently sell for 10,90 EUR via eBay.DE (incl shipping), which is ok.

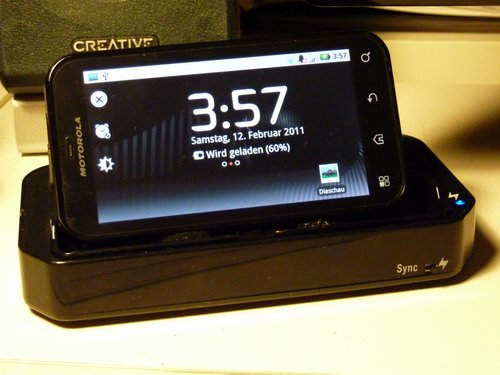
Now, the beauty with these phones is that they flip the screen when you insert them into such a docking station – and display a special screen with access to basic functions like alarm, gallery, media, etc..
In fact, it has two screens – one for desktop docking stations and one for car mounts. You can manually activate the car mount display (huge buttons with access to the navigation system, telephone, music, etc. – very nice, see previous post with bikertech.de image) via a link on the home screen, but I am still to find the link on the menu for this desktop docking screen.
With this docking station, the screen automatically rotates and shows the docking screen. How’s that done? SIMPLE! The phone responds to a magnet which I’ve mounted inside the docking station. In fact, this docking station also came with a small magnet for the Moto Milestone, but it never worked, so I used one of those neodyanamic magnets from last week’s MAKE: LED Throwies DIY project during our local Frankfurt Ignite event wich does the job quite well. You insert the phone et voilà, the screen rotates. Perfect!
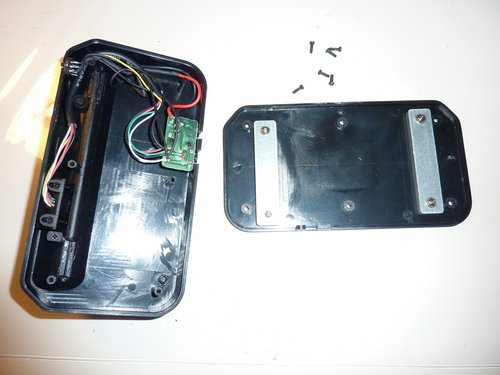
Here’s what I did:

Removed the covers on the screws.

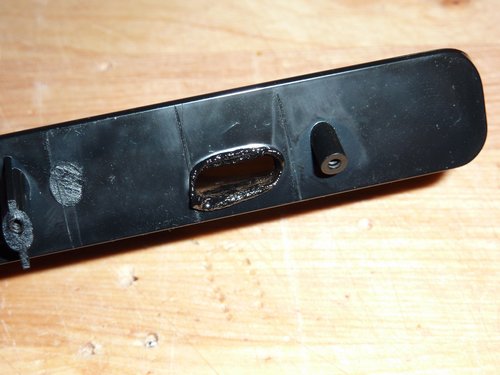
The position of the micro-USB port on the Motorola Milestone obviously differs from the one on the DEFY :-(
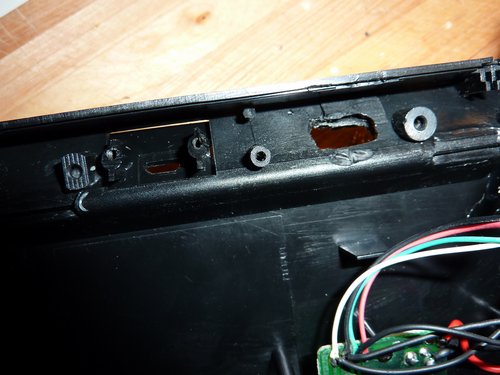
Let’s open it up and see what’s inside:
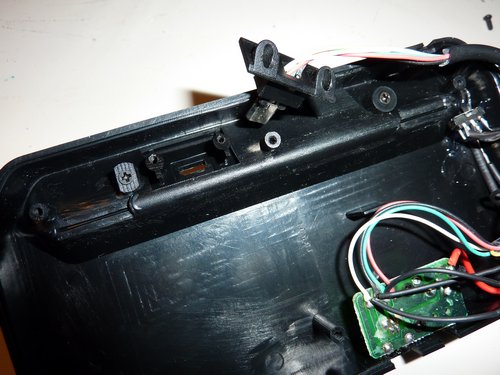
The micro-USB plug is screwed to the plastic frame – good! Let’s remove it….
The old magnet from the Milestone docking unfortunately didn’t work for the DEFY…
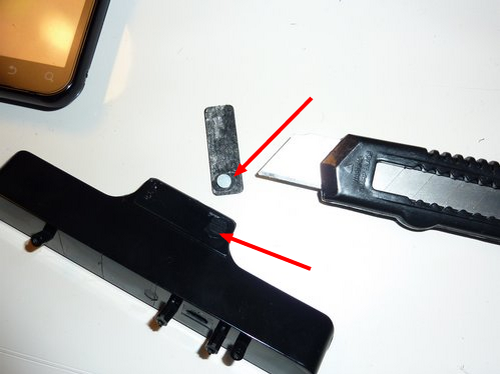
Ok, now this is what you do when you don’t have a Dremel ;-)
(using your soldering iron – very jua kali, but hey, it worked….)
So I “drilled” a new hole for the USB plug…
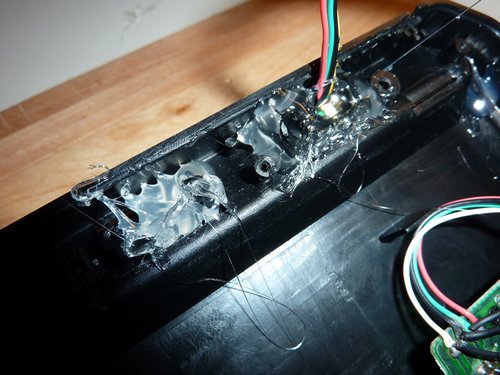
…and fixed everything with hot glue (nasty stuff).

Can you see the magnet in the middle?
Ok, let’s put the bottom cover back on and turn it around:
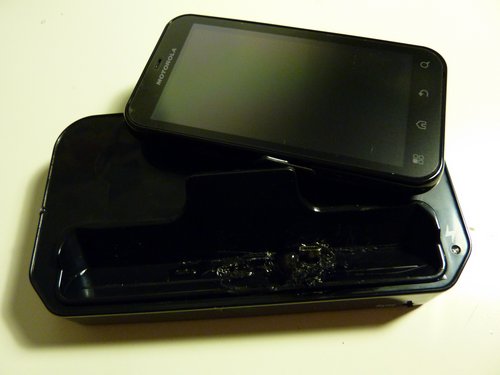
It may not look that nice…..
..but the final result it good, works fine & makes me happy! :-)
This DIY project is based on an idea I picked up on a German Android forum, which also has a pic of where the magnetic sensor is located inside the Motorola DEFY. Btw, the 2 screens for the docking station (a) this view (as above) and b) the car mount view) only depend on the polarity of the magnet. Flip it over and the other screen will load. Obviously, this isn’t possible with my construction because I’ve glued the magnet to the plastic frame. But you get the idea and may want to use it on your own DIY car mount….
And yes, this docking station will certainly never be as elegant as the slim one for the iPhone, but it fits the phone and does what its supposed to do. Also, there’s something about Motorola I will never understand. The hardware and build quality they offer is terrific! But anything beyond that like adopting the open Android approach (i.e. open bootloaders) or cooperating with third party accessory dealers – nada. Motorola, to me, is like a headmaster of a conservative school that prefers adults (business customers) only. Very strange…
hello. thx for the tutorial. I am looking for defy dock my self. but I am using otterbox on my defy, ok i know it’s little bit to much for this rugged phone but otterbox is the only way for me to put a lanyard on my phone. it can handle if it slips to the road but a lanyard is usefull if i dont want it to sink in the pond. so my question is can I use droid1/droid2 dock with with my ottered defy? will it fit? thx before.
I’ve been asked this before and I would say: yes, you can use both on this docking station.
I’ve previously used an Otterbox Commuter on my Nokia E72 and loved them. The one I know from the Defy adds about 2-3mm in thickness to the sides.
The mod with these Droid docks is that you basically select your own (new) position for the plug – which should be enough for a Defy in an Otterbox silicone cover.
original http://www.flickr.com/photos/kikus/5562989491/
The only realistic limitation will probably be the distance to the front side, but even this should be enough. To the sides, the maximum width of the docking bay is about 11,4cm (4″ 2/8 ?). Imo, that’s enough space for a Defy in an Otterbox or any other silicone cover.
Oh, and you also set the height of the plug. You can see on my snapshots above that I’ve used hot glue to fix everything.